Skip to content

Citrix

Citrix App Layering – Basis configuration 4.2 – Part 4

Part 4 – Creating the OS Layer

  1. Click on “Layers” in the top menuSkærmbillede 2017-06-01 kl. 21.10.09
  2. Click on Skærmbillede 2017-06-01 kl. 21.12.58
  3. On the right on “Create OS Layer” Skærmbillede 2017-06-01 kl. 21.14.24.png
  4. Under “Layer Details” fill in the name of the wished OS Layer, in my case it is Windows Server 2016 and it is version 1. Screenshot_26
  5. Click on “New” to add a connection to your hypervisor. I will add XenServer in this example.Screenshot_27
  6. Select your hypervisor type in the dropdown box and click “New”Screenshot_28
  7. Fill in the details of your XenServer as shown below. Remember to check credentials Screenshot_32Screenshot_29Screenshot_30
  8. Below the XenServer details you need to fill in the template machine on the XenServer. Select the template in the dropdown box and also select the storage repository. Click on “Test” to verify all is OK. Click on “Save”Screenshot_31
  9. Mark the new connection and continue to the next section.Screenshot_36
  10. Click on “Select Virtual Machine”Screenshot_37
  11. Select your reference machine to add into your Citrix App Layering as OS Layer. Screenshot_38
  12. Verify that you have the correct VM and continue to the next section. Screenshot_39
  13. Select an icon, I just selected one of the defaults but you can also upload one.Screenshot_40
  14. Verify that everything is OK and click on “Create Layer” to start the layer creation.Screenshot_41
  15. In the bottom you can see that the task has started.Screenshot_42
  16. On my server it takes around 40 mins to complete. The creation is done on a consumer HDD that is a few years old so I expect it will be a lot faster on SSD or NVME.

I hope that is guide will help you getting started with Citrix App Layering as it is a awesome piece of software that can ease your XenApp / XenDesktop environment. I plan on expanding this series to also include what is needed to be done on the client/server side of the layering proces.

Citrix App Layering – Basis configuration 4.2 – Part 3

Part 3 – Setting up user rights management

  1. In the top menu click on “Users” and then “Directory Services”Screenshot_12
  2. On the “Connection Details” fill in your domain name under “Directory Junction Name”, your domain controller server name under “Server Address” and for none-secure trafic leave the port to 389 or use 686 and “Use SSL” for secure setup. Click on “Test Connection” and ensure the test has completed successfully. Screenshot_13
  3. In the “Authentication Details” section type a service account that has read permissions to your Active Directory (Any user account that is member of domain users). Again remember to test the account by clicking on “Test Authentication”Screenshot_14
  4. In the dropdown select the base DN as shown below. Click on “Test Base DN” to verify.Screenshot_15
  5. In the “Attribute Mapping” leave the defaults and go to the next section.Screenshot_16
  6. On the “Confirm and Complete” section you can verify the information and then click on “Create Directory Junction” to complete the setup.Screenshot_17
  7. Now click on “Directory Service” Screenshot_19
  8. Browse to where you have your security groups for administration of services. In my case it is under “Citrixlab.dk – Citrix – Groups” and the group is called “SG-CitrixAdmins”Screenshot_20
  9. Mark the group and click on “Edit Properties” on the right of the screenScreenshot_21
  10. You can add machines to the AD Group here, but in this case I will leave it blank and go to the next section.Screenshot_22
  11. On the “Roles” section you can select which security level you want to give to the selected AD Group. In my case this group will be given administrator rights.Screenshot_23
  12. On the “Confirm and Complete” section click “Update Group” to complete the guide. Screenshot_24
  13. Under the “Groups” menu you can see the group is now present.Screenshot_25

This concludes part 3 of the blog series. Part 4 will be online soon as well.

Citrix App Layering – Basis configuration 4.2 – Part 1 and 2

Hi,

In this blog series I will walk you through the basis configuration of Citrix App Layering 4.2

This first post will contain part 1 and 2 of the configuration. Part 3 will be about role based access and part 4 will be on creating your first OS layer.

Part 1 – Getting the Citrix App Layering 4.2 appliance running

  1. Download the appliance from this link https://www.citrix.com/downloads/citrix-app-layering/product-software/citrix-app-layering-42.html
  2. Import the virtual appliance to the hypervisor of your choice, my choice in the guide is Citrix XenServer.
  3. After the appliance is imported you can grab the IP address and open a web browser and paste it in.
  4. When the page is open you will be asked to log in. Username is “Administrator” and password is “Unidesk1” by default. Screenshot_1
  5. Accept the license agreement and click “Close”. Screenshot_2
  6. Change the default password by following the guide as shown in the pictures below Screenshot_3Screenshot_4Screenshot_5Screenshot_6
  7. You will now be presented with a small overview on which steps there are needed create a layer. You can click on “View step” which will take you to the online guidance on creating Citrix App Layers. Here I will click on “Close”Screenshot_7

Part 2 – Setting up file share for use with App Layering

  1. Click on “System” Screenshot_8
  2. Click on “Settings and Configuration” Screenshot_9
  3. Scroll down to “Network File Shares” and click on “Edit” Screenshot_10
  4. Type in the path to a network share on a dedicated server or a shared file server. I always create a service account for these purposes, in the picture below you can see I named mine “SVC-CTXAppLayering”. Click on “Test SMB File Share” before you save and you should be a “Success”Screenshot_11

This concludes the first two parts of this guide. Part 3 will be up really soon.

Citrix Synergy – Recap

Hi,

I have just been at Citrix Synergy for my first time and I have to say it was awesome. I started the week early with instructor led labs on Sunday and Monday and then had an almost full schedule for the regular Synergy week. You can see my whole schedule in the bottom of this post.

One of my main goals for the week was to network with others that I have only talked to online and try and meet new people as well. To be honest this is actually a difficult task for me, but I did manage to talk to some great people that shared information and insights and I really appreciate that! During my week, I talked some automation with Dave Brett and he showed me some of the work he has been doing on using Octoblu with Citrix NetScaler and it is really impressive. Thanks Dave for sharing!

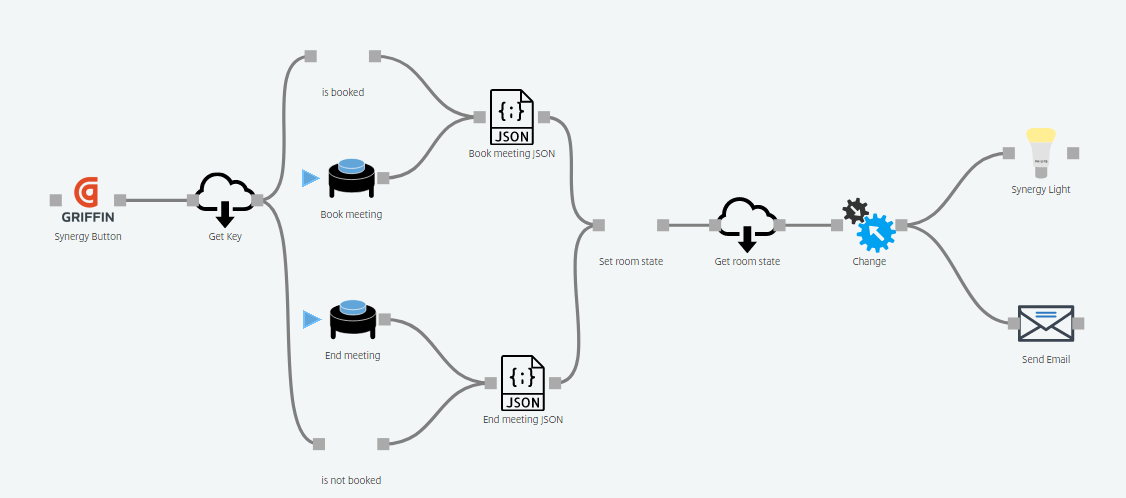
I also talked some IoT and PowerShell with Chris Matthieu who is one of the co-founders of Octoblu and besides from knowing a lot Chris also shares a lot and listens to input from the community. I really hope to be able to create some good workflows with Octoblu and sharing them with the community so thank you Chris for being so inspiring and helping me get started with Octoblu. After my instructor led lab with Chris and Peter I posted what we did on the lab and my thoughts about it. You can read that here: http://citrixlab.dk/?p=257

On the knowledge side, there was a lot of good sessions, but to mention two that stood a bit clearer to me than the others were SYN306 with Andy Wood and Jim Moyle and SYN132 with Thomas Berger, Christian Reilly and James Bulpin. The first session with Andy and Jim was both very fun to attend and the scripts and work they presented was great and something that you can take home and apply to just about every customer with PVS installed. The second session was great because of the views that was presented and the way it was presented.

Besides the regular sessions I also had a fireside chat session about IoT and Octoblu. This session was good because of the relaxed attitude, the questions from both James Bulpin and the audience and lastly the awesome demos from Dave Brett and Tobias Kreidl. Dave showed of Octoblu turning on and off vServers and auto-scaling of web servers, and Tobias showed what Octoblu can do for home automation.

The keynote session with General Colin Powell was also one of the best presentation I have ever heard. When he talked he was so inspiring, the way he told stories from his time as secretary of state really inspired me and from what I picked up from the crowd everyone else had the same feeling. The way General Colin Powell talked about leadership and how to be a leader seems like something every leader should hear and think about.

If I get a chance to go to Synergy next year my main goal will be the same and after this year I do think I will be a lot easier to go and talk with just about anyone who wants to talk about Citrix and automation.

If you are not following the people I have mentioned here on twitter you should really do so, here are their twitter profiles:

https://twitter.com/tberger80

https://twitter.com/JamesBulpin

https://twitter.com/reillyusa

https://twitter.com/dbretty

https://twitter.com/gilwood_cs

https://twitter.com/JimMoyle

https://twitter.com/tkreidl

https://twitter.com/chrismatthieu

https://twitter.com/xenappblog

My schedule was:

LAB608: Workspace IoT makerspace

LAB609: Deploying Workspace Environment Management for XenApp and XenDesktop

LAB615: Deploying and automating Citrix solutions with Citrix Cloud and AWS

KEY001: Vision Keynote

KEY002: Technology Keynote

SYN413: Microsoft Containers in a Citrix world

SYN306: Solving PVS challenges with simple shell scripts

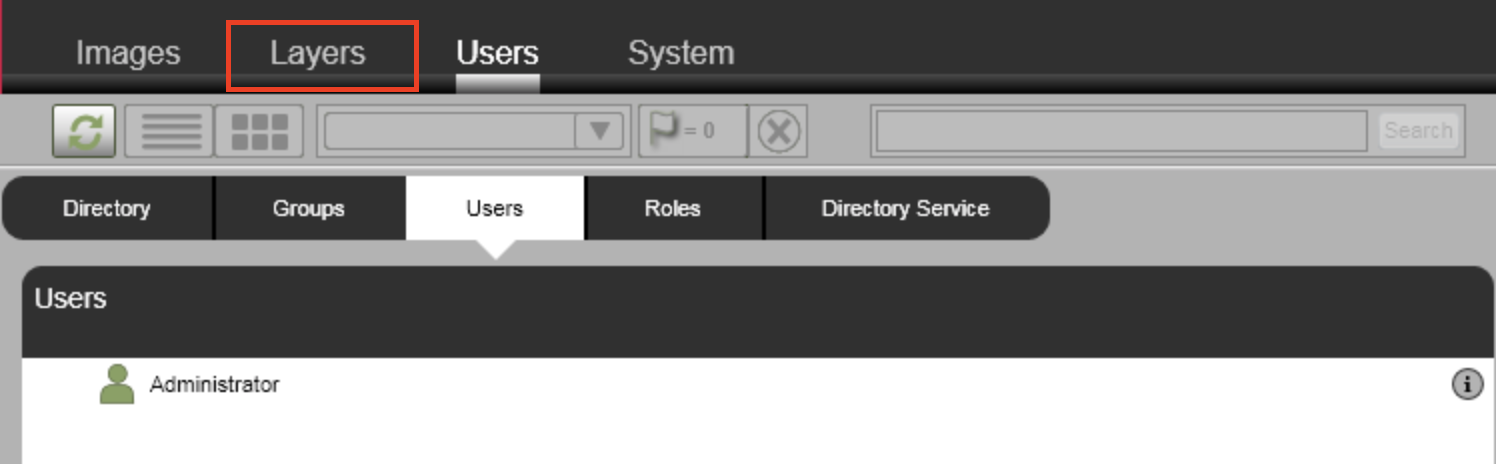
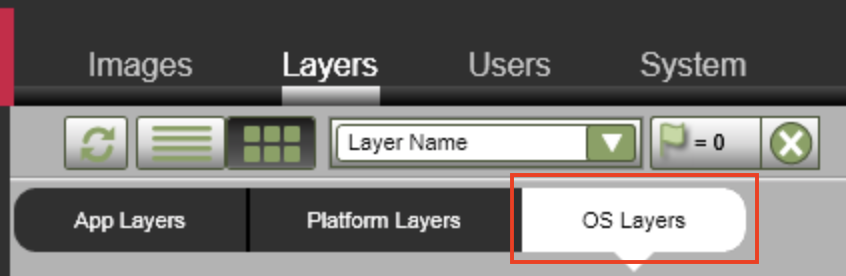
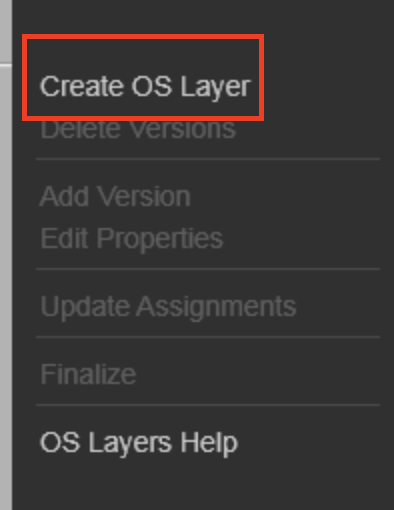
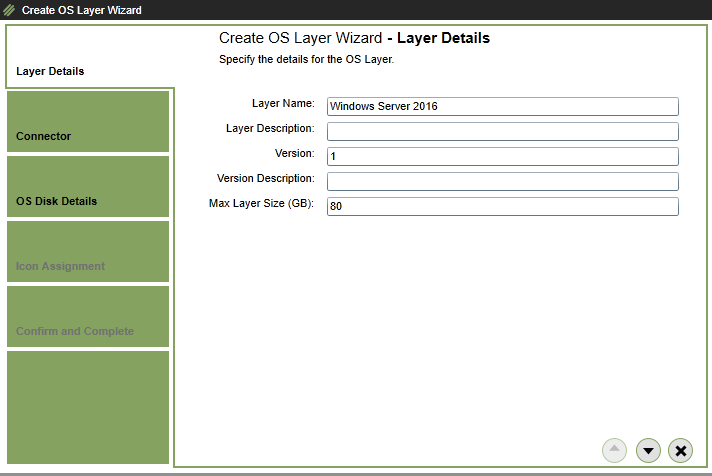
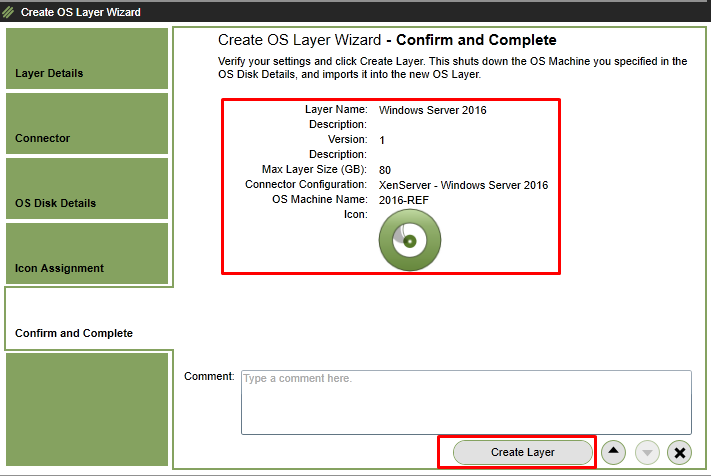
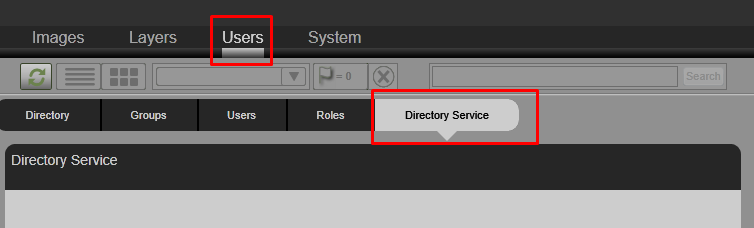
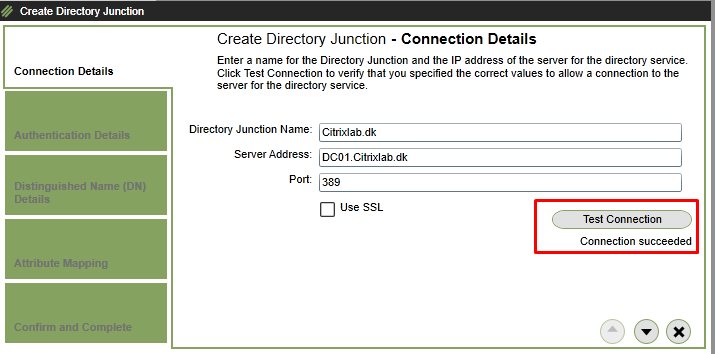
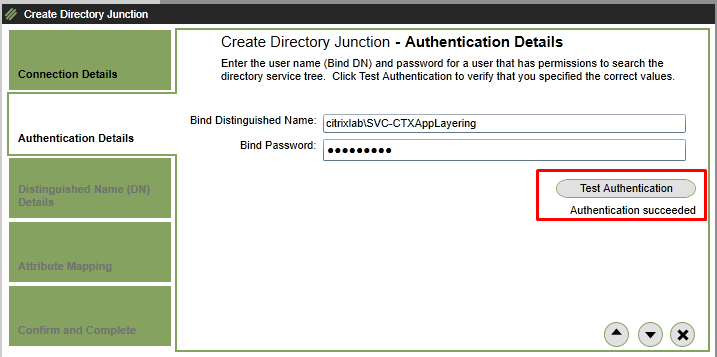
SYN103: Citrix App Layering

SYN131: Citrix Workspace IoT

SYN401: Fireside chat with IoT experts about automating Citrix with Octoblu

KEY004: Innovation Super Session – General Colin L. Powell, USA (Ret.)

SYN132: It’s the end of work as we know it

SYN330: Optimize and scale your XenApp and XenDesktop platform the CTP way

SYN205: Hot Topics Roundtables

SYN106: Fantastic four: the do’s, don’ts and lessons learned of Citrix implementations

Citrix Synergy – IoT and Citrix Octoblu

So, attending my first Citrix Synergy this week and starting it all off with some instructor led labs.

A little background on workspace IoT is that it connects apps, data, devices and people. The goal is to create the best user experience and reduce the complexity for users. Combining applications, data and users with IoT you have the ability to make information flow both ways in an infrastructure and using analytics/BI you can makes the information easy to read and use.

IoT is about engaging with devices and depending on what is happening in the space around a device different things can be started, shutdown or any other action you want to happen. The workspace hub can collect information from devices and upload and interact with other systems to offload for instance healthcare data for a patient from an iPad into the medical journal when entering a room.

Boundaries can be Wi-Fi or Bluetooth and there can be multiple boundaries inside of the same building.

The lab about workspace Internet of Things (IoT) was very good and we learnt how to setup a basic flow that can be used for meeting rooms. The session was intended to get started with Citrix Octoblu and after the session we had an idea about how a meeting room could be set up to make it easier for end users. The flow didn’t integrate with Skype for Business or any other online meeting provider, but it did show what was needed for the rest of the workflow. When I get back after Synergy I hope to try the Skype for Business integration so we can demo how it is working for our customers. Below is a picture of how the workflow we created looks.

Screenshot_1.png

If you have any use cases about using IoT I would love to hear about it.

To find more information about workspace have a look at this page:

https://www.citrix.com/products/smart-spaces.html product information page