Generating wildcard certificate from internal certificate authority using PowerShell
DISCLAIMER: THIS IS NOT INTENDED FOR ANY PRODUCTION ENVIRONMENT
Updated on June 24th 2017: Correction to issue where the server it was running on already has a server authentication certificate. Thank you Eric (@XenAppBlog) for the feedback.
Updated on June 25th 2017: Updated with a new version of the script that requires Windows 10 or Server 2016. The updated version adds support for password protection of the PFX file and it also cleans up private keys after export.
Hi all,
When you are building Citrix environments or any other environment that uses certificates it is often easiest to use a wildcard certificate from your internal PKI infrastructure when you are testing. I had a talk with Dave Brett at Synergy about automating the process of getting a wildcard PFX certificate that can be used during automation of Citrix installations. I thought it would be an easy task since Microsoft has baking in PowerShell in most of their products and services now, but it turned out that I couldn’t find any native PowerShell commands that allowed be to perform the task.
Since I like doing PowerShell scripts an automation that of course wasn’t the end of it, so I started digging into what can be done and I found this script on the Microsoft Script Center: MS Script Center The problem I had with this script is that I wouldn’t do wildcard certificates.
After a while I started to build my own script from scratch, but of course getting a lot of inspiration from the script found on MS Script center. I build the script out so that I would locate the CA inside the domain by itself (only tested when there is one CA in the environment) and the doing an export to a file server as well.
The script needs to be run as a domain user, so that cause a lot of testing when incorporating it with Microsoft MDT, but got that working in the end.
To use the script in MDT follow these steps:
- Add a “Run Command Line” action to the task sequence

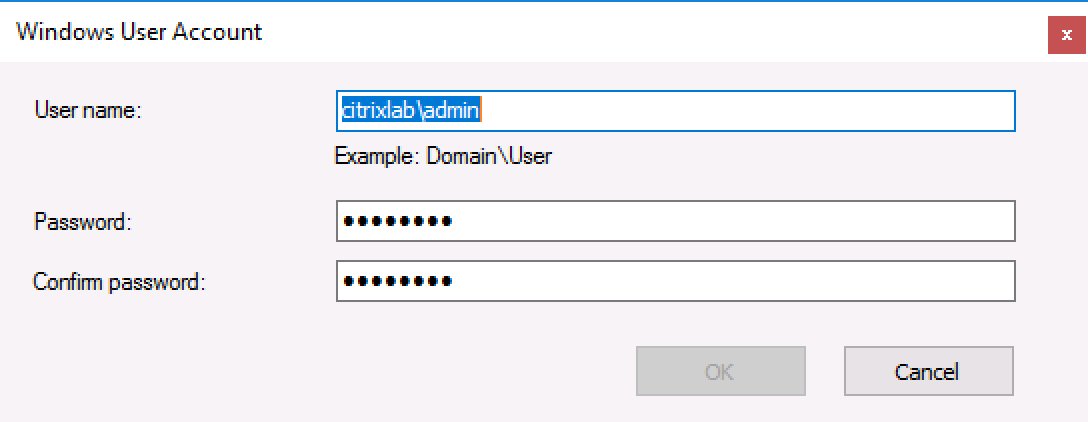
- Mark “Run this step as the following account” and enter a domain user name and password as shown below
- Place the scripts in the scripts folder (or any other place you feel like and can reference)

- Edit the “New-WildcardCertificate.cmd” file to map the network drive of your choice and execute the PowerShell script. If you follow my guide it will map to your MDT deployment share.

- Run the task sequence and test it out.
The PowerShell script is shown in the bottom of this post and as always let me know if you have input or questions about it.
You can download the two scripts and ini file here: Download
/Martin
<#
.Synopsis
   Automate the creation of wildcard certificates
.DESCRIPTION
   This script can automate the creation of wildcard certificates from an internal PKI infrastructure.
   The output PFX file will not have a password and it will be placed in the folder the PS1 script is located.
   You will need to have the SSL.INI file in the same folder as this script and you will need to run the script as a domain users.
   Use the function within this script by editing the line in the buttom.
.PARAMETER Path
  Path to where temporary files are stored
.PARAMETER PFXPath
  Path to where the PFX file is exported
.PARAMETER CAName
  Name of the Certificate authority
.EXAMPLE
   New-WildcardCertificate
.EXAMPLE
   New-WildcardCertificate -Path C:\Temp -PFXPath "\\FILE01\Certificates"
.EXAMPLE
   New-WildcardCertificate -Path C:\Temp -PFXPath "\\FILE01\Certificates" -CAName "DC01.Domain.Com\Domain-DC01-CA"
#>
Function New-WildcardCertificate {
    [CmdletBinding()]
    Param(
      [Parameter(Mandatory=$False,Position=1)]
       [string]$Path = "C:\Windows\Temp",
       [Parameter(Mandatory=$False,Position=2)]
       [string]$PFXPath = ".",
       [Parameter(Mandatory=$False,Position=3)]
       [string]$CAName
    )
    Begin {
        $Domain = (Get-ItemProperty -path hklm:\SYSTEM\CurrentControlSet\Services\Tcpip\Parameters -Name Domain).Domain
        If (!(Test-Path -Path $PSScriptRoot\ssl.ini)) {
            Write-Host "You don't have the SSL.INI file that is required to run this script" -ForegroundColor Red
            Break;
        }
        If (!(Test-Path -Path $Path)) {
            New-Item -Path $Path -ItemType Directory
        }
        (Get-Content $PSScriptRoot\ssl.ini) | Foreach-Object {$_ -replace 'ServerFQDN',"*.$Domain"}  | Out-File .\Wildcard.ini
    }
    Process {
        If ($CAName -eq "") {
            Write-Verbose "Finding certificate authority"
            $CA = New-Object -ComObject CertificateAuthority.Config
            $CAName = $CA.GetConfig(0)
        }

        Write-Verbose "Requesting certificate"
        & c:\windows\system32\certreq.exe –new "Wildcard.ini" "$Path\wildcard.req"
        & c:\windows\system32\certreq.exe -config "$CAName" –submit "$Path\wildcard.req" "$Path\wildcard.cer"

        Write-Verbose "Installing certificate"
        & c:\windows\system32\certreq.exe –accept "$Path\wildcard.cer"

        Write-Verbose "Exporting certificate and private key"
        $cert = new-object security.cryptography.x509certificates.x509certificate2 -arg "$Path\wildcard.cer"

        $certbytes = $cert.export([System.Security.Cryptography.X509Certificates.X509ContentType]::pfx)

        $certbytes | Set-Content -Encoding Byte  -Path "$PFXPath\Wildcard.pfx" -ea Stop
        Write-Verbose "Certificate successfully exportert to wildcard.pfx"
    }
    End {
        Write-Verbose "deleting exported certificat from computer store"
        Remove-Item -Path cert:\localmachine\my\$($Cert.Thumbprint) -DeleteKey
        Remove-Item -Path $Path\wildcard.cer -Force
        Remove-Item -Path $Path\wildcard.req -Force
        Remove-Item -Path $Path\wildcard.rsp -Force
    }
}
New-WildcardCertificate -Path C:\Install -PFXPath "\\Server01\Shares" -Verbose
For Windows 10 and 2016 only:
<#
.Synopsis
   Automate the creation of wildcard certificates
.DESCRIPTION
   This script can automate the creation of wildcard certificates from an internal PKI infrastructure.
   The output PFX file will not have a password and it will be placed in the folder the PS1 script is located.
   You will need to have the SSL.INI file in the same folder as this script and you will need to run the script as a domain users.
   Use the function within this script by editing the line in the buttom.
.PARAMETER Path
  Path to where temporary files are stored
.PARAMETER PFXPath
  Path to where the PFX file is exported
.PARAMETER CAName
  Name of the Certificate authority
.EXAMPLE
   New-WildcardCertificate
.EXAMPLE
   New-WildcardCertificate -Path C:\Temp -PFXPath "\\FILE01\Certificates"
.EXAMPLE
   New-WildcardCertificate -Path C:\Temp -PFXPath "\\FILE01\Certificates" -CAName "DC01.Domain.Com\Domain-DC01-CA"
#>
Function New-WildcardCertificate {
    [CmdletBinding()]
    Param(
      [Parameter(Mandatory=$False,Position=1)]
       [string]$Path = "C:\Windows\Temp",
       [Parameter(Mandatory=$False,Position=2)]
       [string]$PFXPath = ".",
       [Parameter(Mandatory=$False,Position=3)]
       [string]$CAName,
       [Parameter(Mandatory=$False,Position=4)]
       [string]$Password
    )
    Begin {
        $Domain = (Get-ItemProperty -path hklm:\SYSTEM\CurrentControlSet\Services\Tcpip\Parameters -Name Domain).Domain
        If (!(Test-Path -Path $PSScriptRoot\ssl.ini)) {
            Write-Host "You don't have the SSL.INI file that is required to run this script" -ForegroundColor Red
            Break;
        }
        If (!(Test-Path -Path $Path)) {
            New-Item -Path $Path -ItemType Directory
        }
        (Get-Content $PSScriptRoot\ssl.ini) | Foreach-Object {$_ -replace 'ServerFQDN',"*.$Domain"}  | Out-File .\Wildcard.ini
    }
    Process {
        If ($CAName -eq "") {
            Write-Verbose "Finding certificate authority"
            $CA = New-Object -ComObject CertificateAuthority.Config
            $CAName = $CA.GetConfig(0)
        }
        Write-Verbose "Requesting certificate"
        & c:\windows\system32\certreq.exe –new "Wildcard.ini" "$Path\wildcard.req"
        & c:\windows\system32\certreq.exe -config "$CAName" –submit "$Path\wildcard.req" "$Path\wildcard.cer"

        Write-Verbose "Installing certificate"
        & c:\windows\system32\certreq.exe –accept "$Path\wildcard.cer"

        Write-Verbose "Exporting certificate and private key"
        $PFXPassword = ConvertTo-SecureString -String $Password -Force -AsPlainText
        $cert = new-object security.cryptography.x509certificates.x509certificate2 -arg "$Path\wildcard.cer"
        Get-item cert:\localmachine\my\$($cert.Thumbprint) | Export-PfxCertificate -FilePath "$PFXPath\Wildcard.pfx" -Password $PFXPassword
        Write-Verbose "Certificate successfully exportert to wildcard.pfx"
    }
    End {
        Write-Verbose "deleting exported certificat from computer store"
        Remove-Item -Path cert:\localmachine\my\$($Cert.Thumbprint) -DeleteKey
        Remove-Item -Path $Path\wildcard.cer -Force
        Remove-Item -Path $Path\wildcard.req -Force
        Remove-Item -Path $Path\wildcard.rsp -Force
    }
}
New-WildcardCertificate -Path C:\Install -PFXPath "\\Server01\Shares" -Password "Password1" -Verbose