Pester for XenApp 6.5
Hi,
I am currently working on a project where we are building a new XenApp 6.5 environment (Yes, we know it’s not the best idea, but there are reasons). For this project with need to hand in an operational acceptance test (OAT) and part of that is showing that the infrastructure is working as expected. After watching a youtube video from PSConf.eu (https://www.youtube.com/watch?v=Qy-uvT57pt8 I was inspired to use Pester as the base for doing the infrastructure server tests. Of course, there is more to the OAT but I won’t look into that is this post.
For those of you that has never heard about Pester it is basically a “tool” that will test your PowerShell code and alert you of anything in the code that doesn’t behave as you intend. If you really want to dig into PowerShell coding you should start with writing your Pester tests and then your PowerShell code afterwards. This force you to think about what you want to achieve and create the tests for it before you write the code doing it. You can read more about Pester here: https://github.com/pester/Pester/wiki/Pester
After watching the video from Rob I started right away on building my Pester tests so much of my evenings this week has gone with this. Writing a Pester test isn’t that hard and doesn’t take much time, but finding out what to test and how to test it can take a bit of time.
So, what did I do to get started with Pester?
As stated I watched the video on youtube and then I found this post by Adam Bertram: https://mcpmag.com/articles/2016/12/01/create-a-simple-pester-test-report.aspx
After that I made a list over the infrastructure roles I wanted to test, my list looks like this:
Citrix XenApp 6.5 Zone Data Collector
Citrix XenApp 6.5 Worker
Citrix StoreFront
Citrix PVS
Microsoft App-V
My next step was to examine the services running on the infrastructure servers and note down the display name and name of each service.
For each of these services I created a Pester test looking like this:
it "Citrix PVS Soap Server" -Skip:$ServerAlive{
                (Get-Service -Name soapserver -ComputerName $PVSServer).Status | Should be "Running"
}
Since I wanted to be able to separate the roles I created loops for each role and feeding all servers from a specific OU into these loops. The base is looking like this:
Foreach ($PVSServer in $PVSServers) {
    If (Test-Connection -ComputerName $PVSServer -ErrorAction 0 -Count 1 -Quiet) {
        $ServerAlive = $false
    } Else {
        $ServerAlive = $true
    }
    Describe "Check Citrix Infrastructure on $PVSServer" {
        Context "Citrix PVS" {
            it "Citrix PVS Soap Server" -Skip:$ServerAlive{
                (Get-Service -Name soapserver -ComputerName $PVSServer).Status | Should be "Running"
            }
            it "Citrix PVS Stream Service"  -Skip:$ServerAlive {
                (Get-Service -Name StreamService -ComputerName $PVSServer).Status | Should be "Running"
            }
            it "Citrix PVS Two-Stage Boot Service"  -Skip:$ServerAlive {
                (Get-Service -Name PVSTSB -ComputerName $PVSServer).Status | Should be "Running"
            }
        }
    }
}
I quickly found out that I can just settle for services, I need to have at least open ports and registry settings in the Pester tests as well. You can see the examples below:
it "Port 1494 is open" -Skip:$ServerAlive {
                    (Test-NetConnection -ComputerName $XA65Server -Port 1494).TcpTestSucceeded | should be "True"
}
it "Initial database name" -Skip:$ServerAlive {
                    $Reg = [Microsoft.Win32.RegistryKey]::OpenRemoteBaseKey('LocalMachine',$XA65Server)
                    $KeyPath = 'software\policies\Citrix\ima\database settings'
                    $CitrixDatabaseName = $Reg.OpenSubKey($KeyPath)
                    $CitrixDatabaseName = $CitrixDatabaseName.GetValue('InitialDatabaseName')
                    $CitrixDatabaseName  | Should be $InitialDatabaseName
}
All this combined has made up what I am needing right now, but I am sure that I will find more tests I want to implement in this XenApp 6.5 environment so this post might be updated later as well.
The last part of the Pester setup for me was to create a nice report that I can show to the project manager so that he knows that has been tested and what the status is. For instance, I know there are errors in the environment, but they should not be fixed right now. Putting it into a report was easy, but I had some trouble getting the EXE file needed. The EXE file is for ReportUnit (http://reportunit.relevantcodes.com) but their download didn’t work for me so I was in luck that the community is there because Rob Sewell @sqldbawithbeard send the EXE to me and in 5 mins the report was ready.
The report looks like this and it is awesome if I should say so!
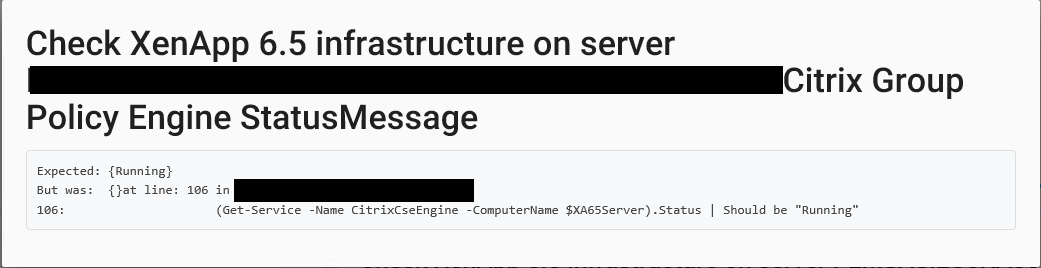
If we look a bit deeper in the HTML report you can see both skipped and failed tests. The skipped tests are because I first test if the server is online, if it isn’t I skip the tests that were meant to run on it. The failed attempts speak for themselves and you can see below one of the tests that are failed. 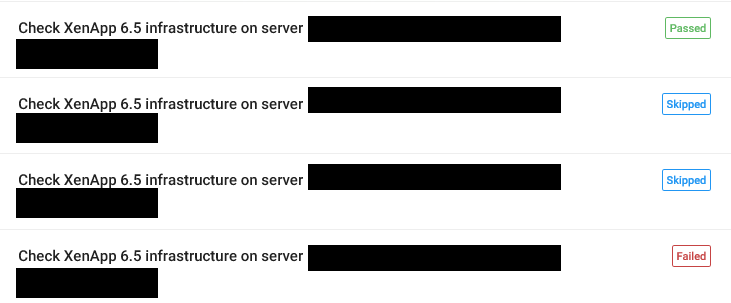
This was a short intro into how I got started with Pester. In the future I am sure I will create the same tests for XenApp 7.x and the surrounding components. If you are interested in these let me know.
/Martin
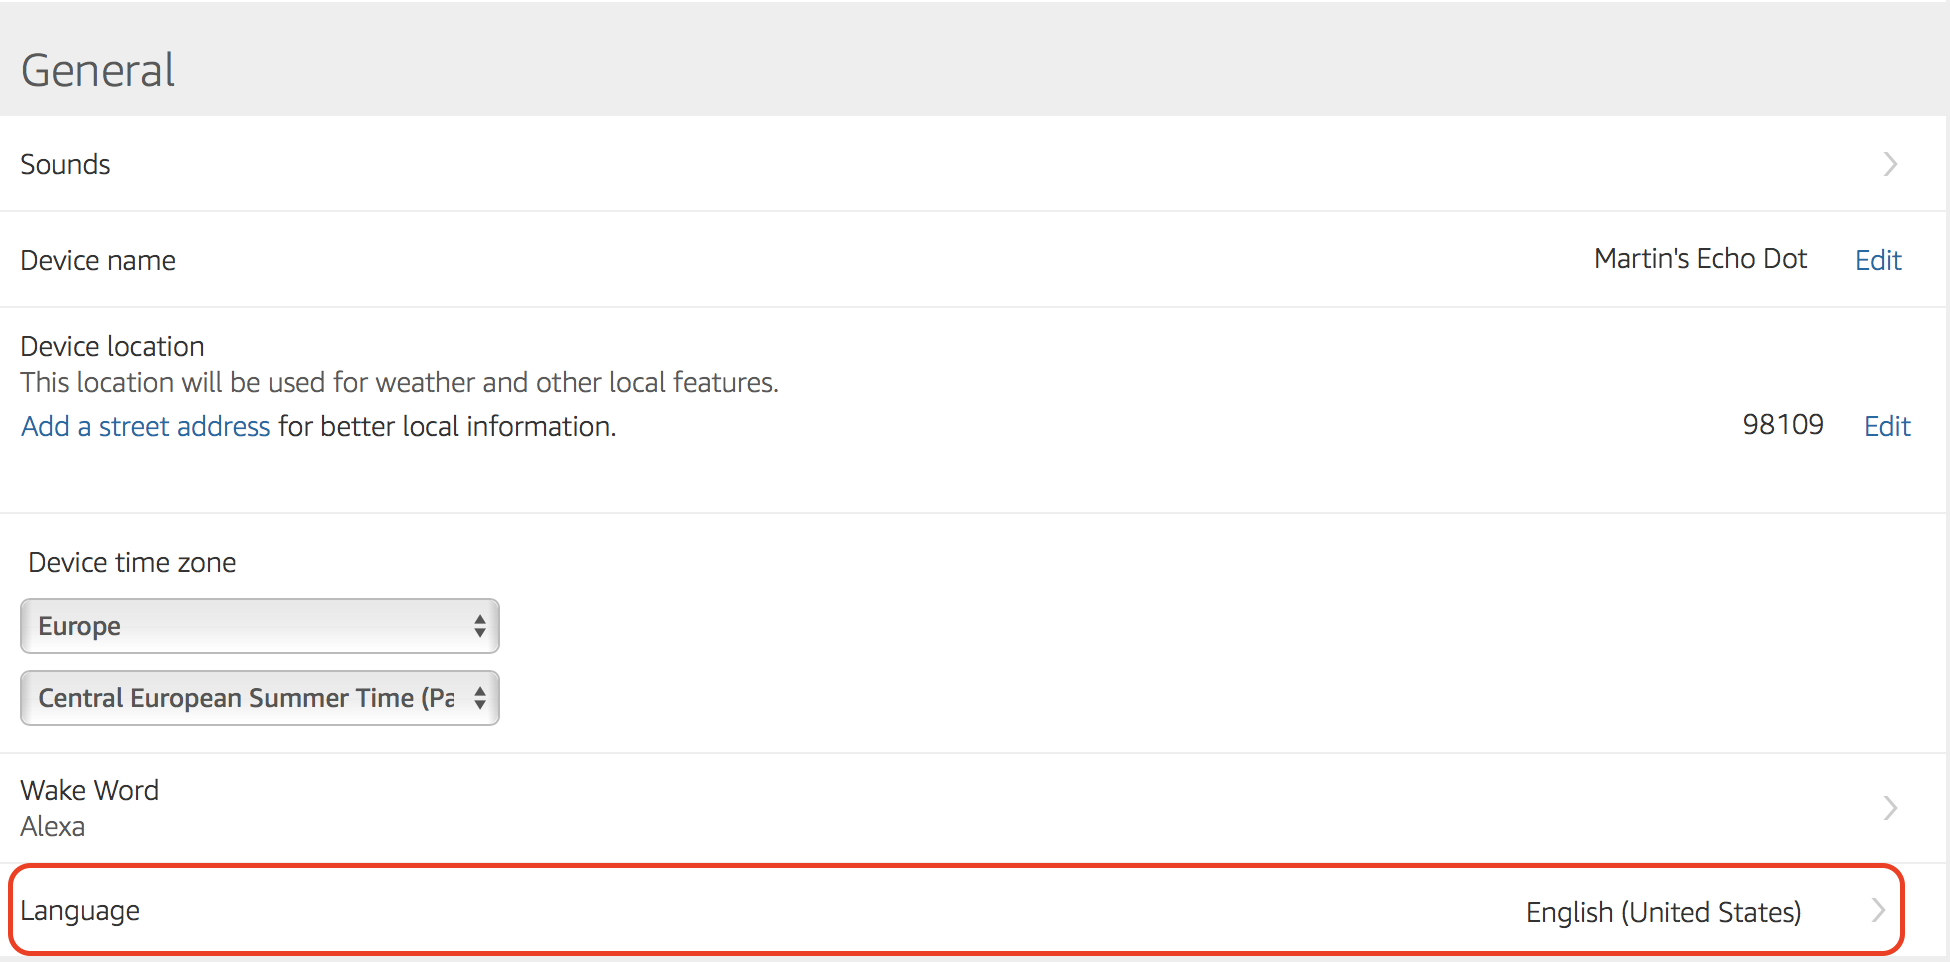


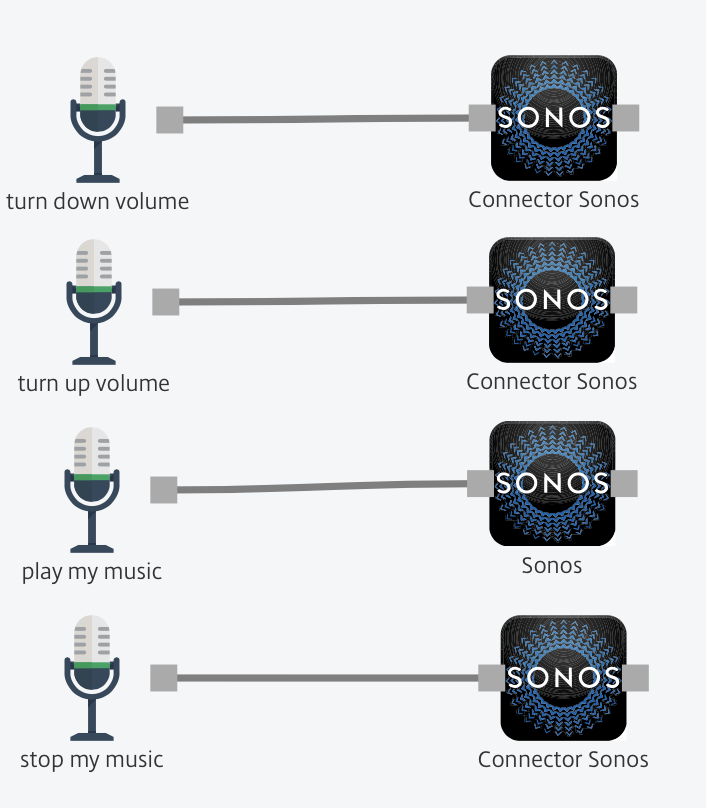
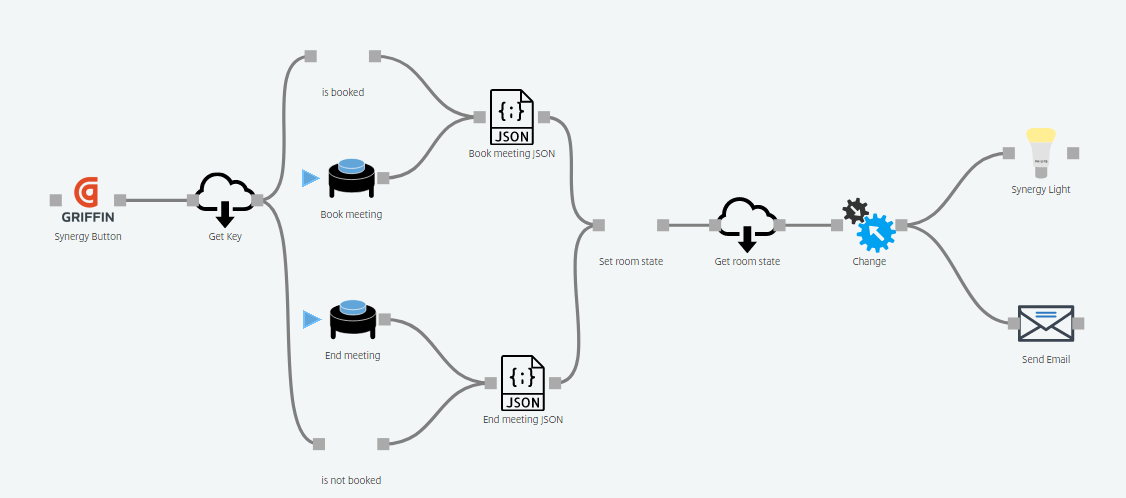
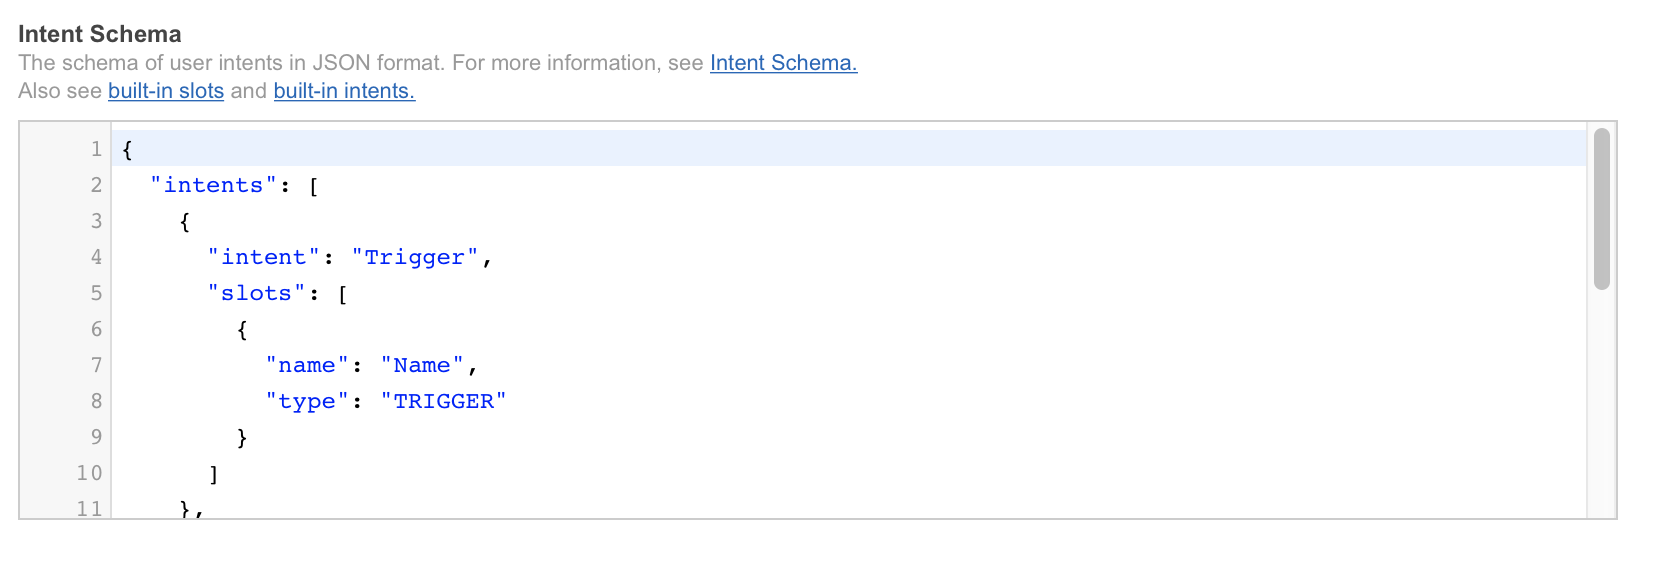 8. In the “Custom slot types” type in “TRIGGER” under “Enter Type”. “Enter Values” will be the commands Alexa and Octoblu needs to handle, in my case “play my music” and “stop my music”. When used with Alexa this will translate into “Alexa ask octoblu play my music”.
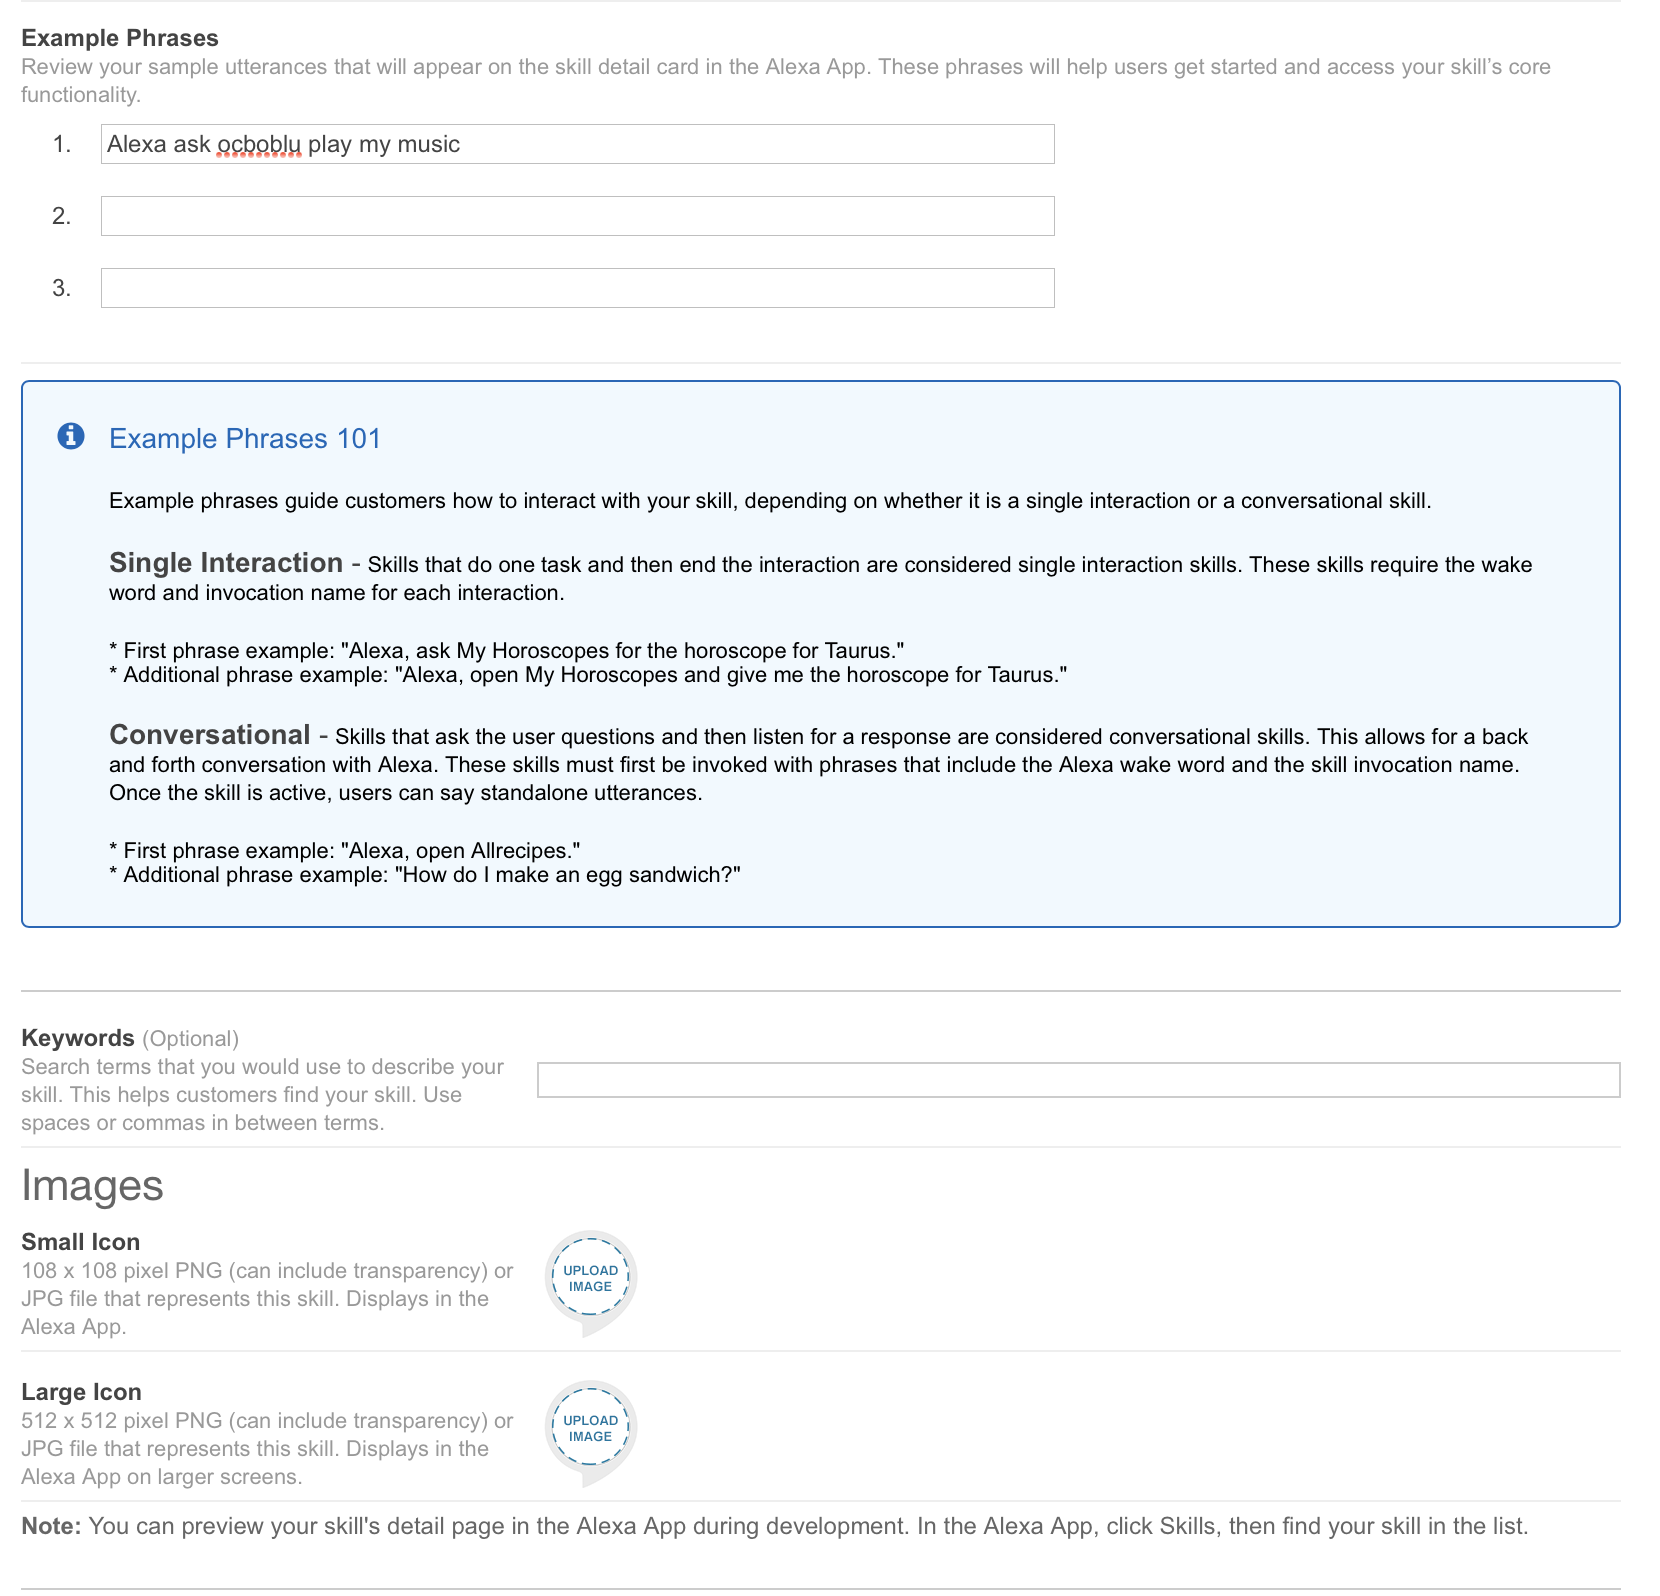
 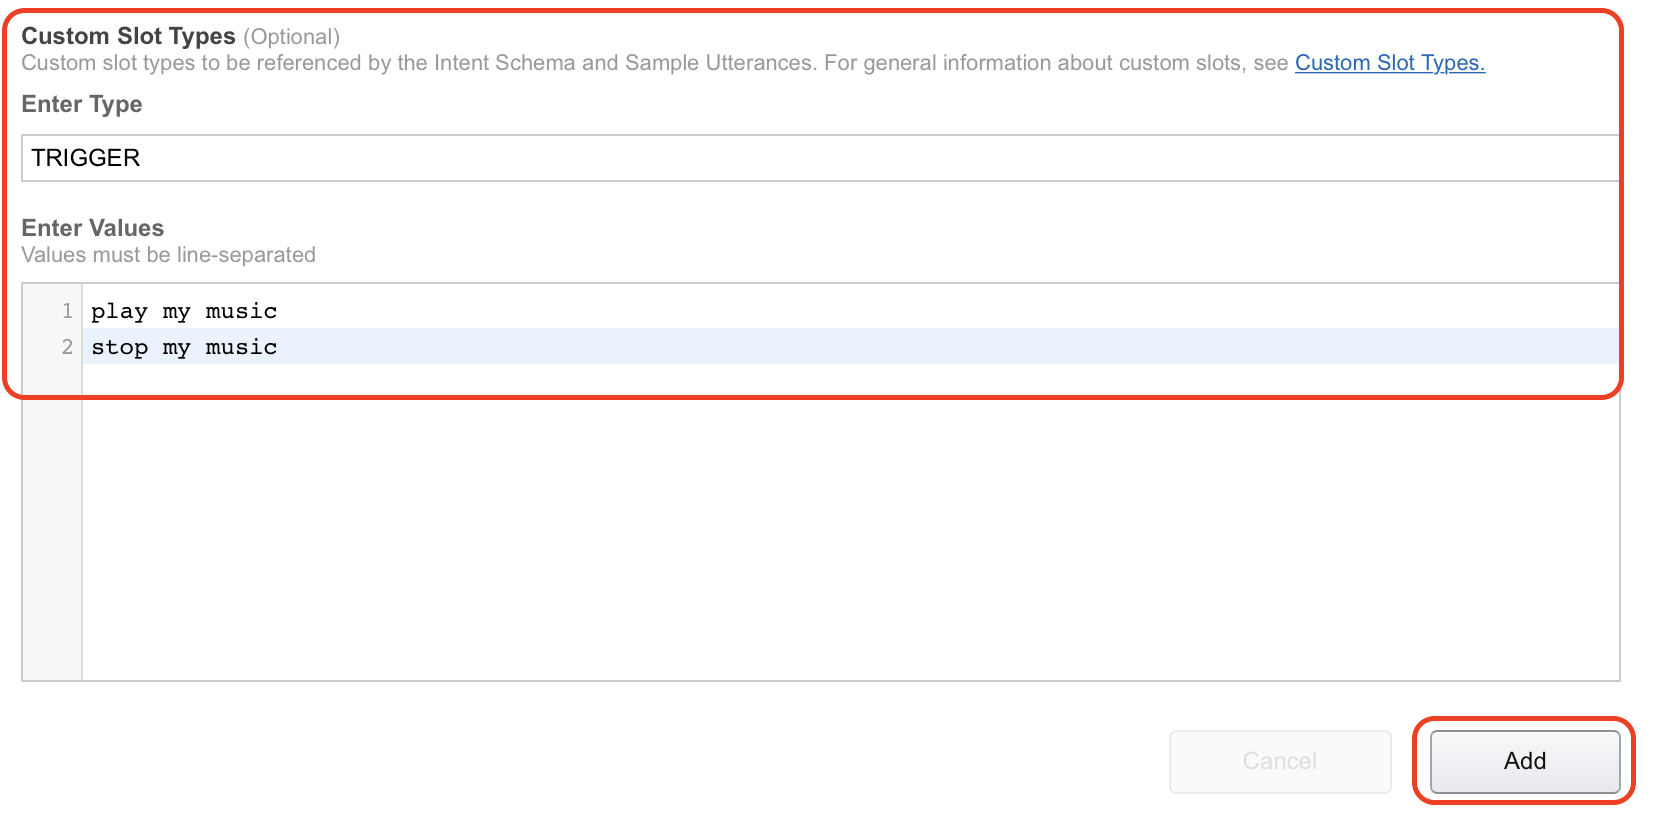 9. Under “Sample utterances” I have filled in the information from the guide as well. I have pasted both code and picture in below to illustrate.
  10. Click on “Next” to continue with the setup.
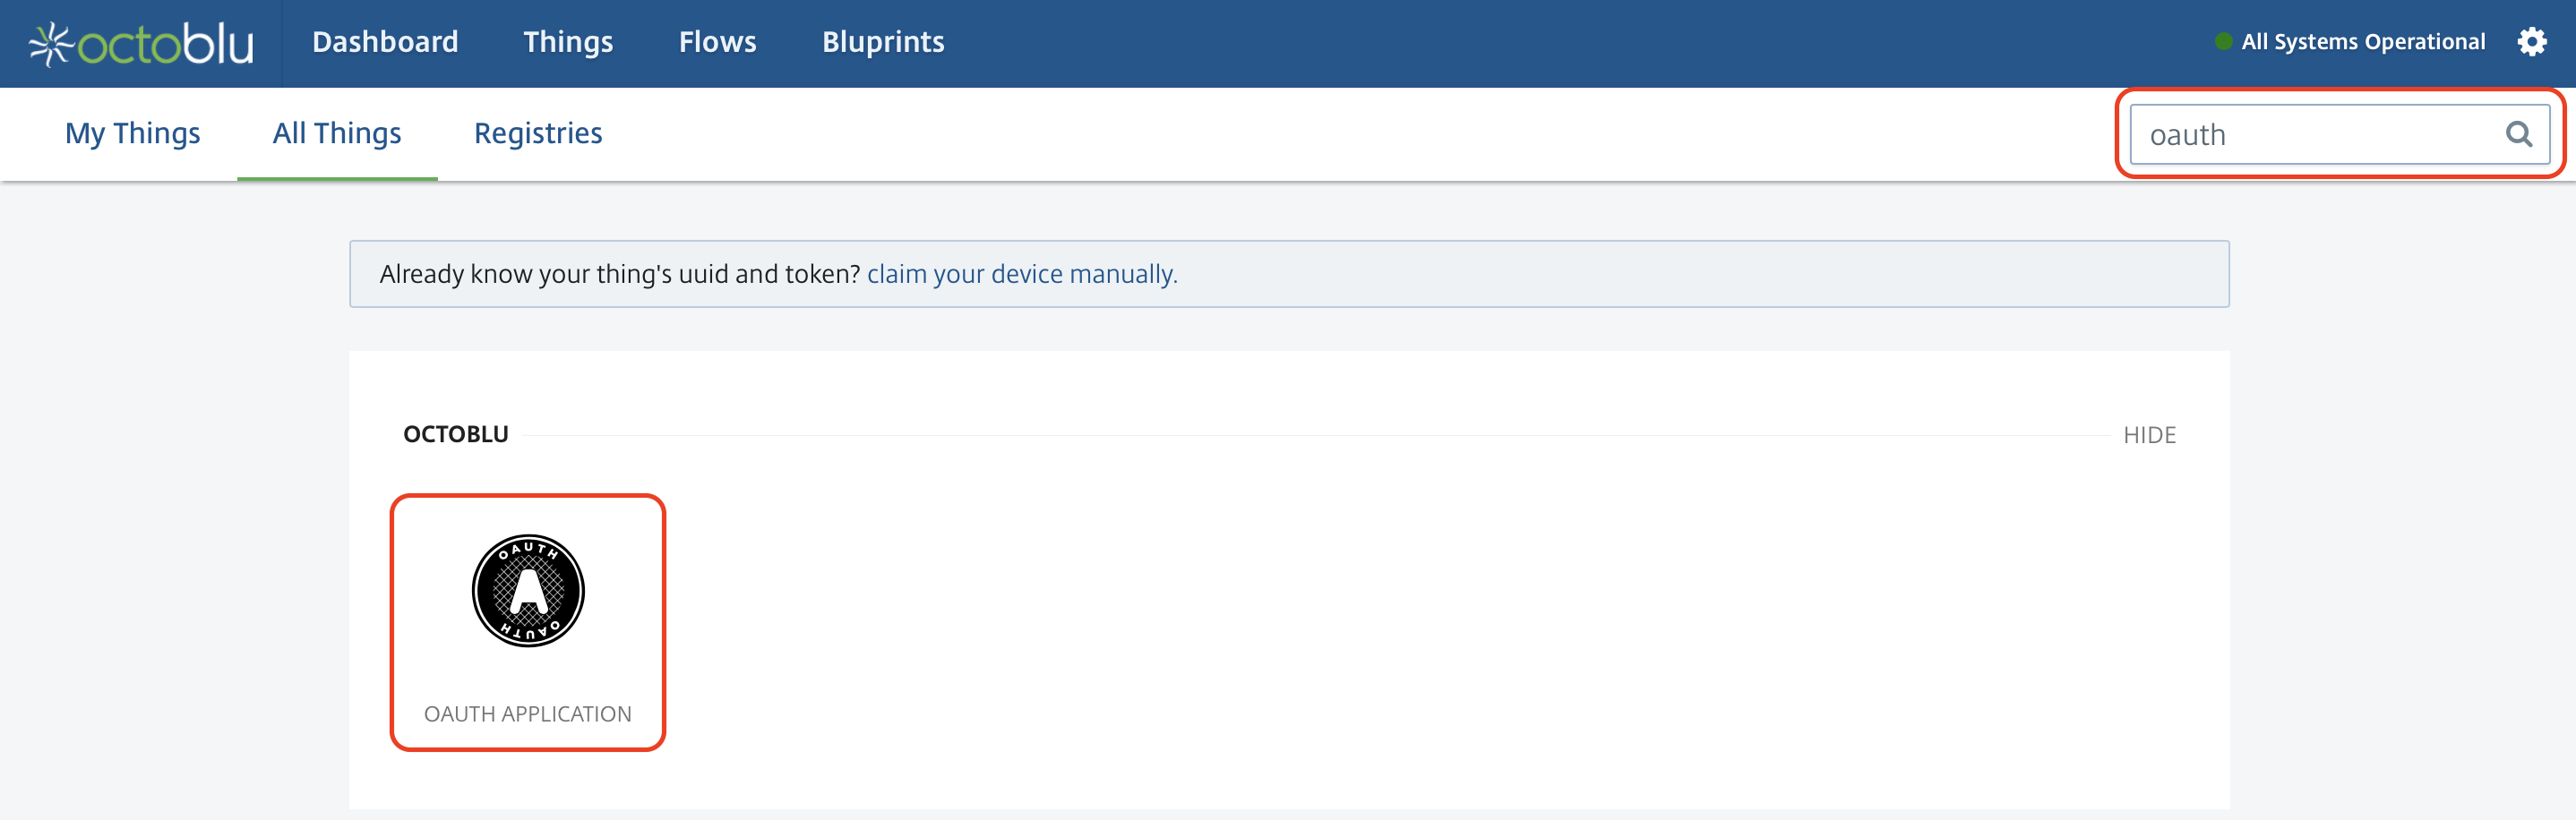
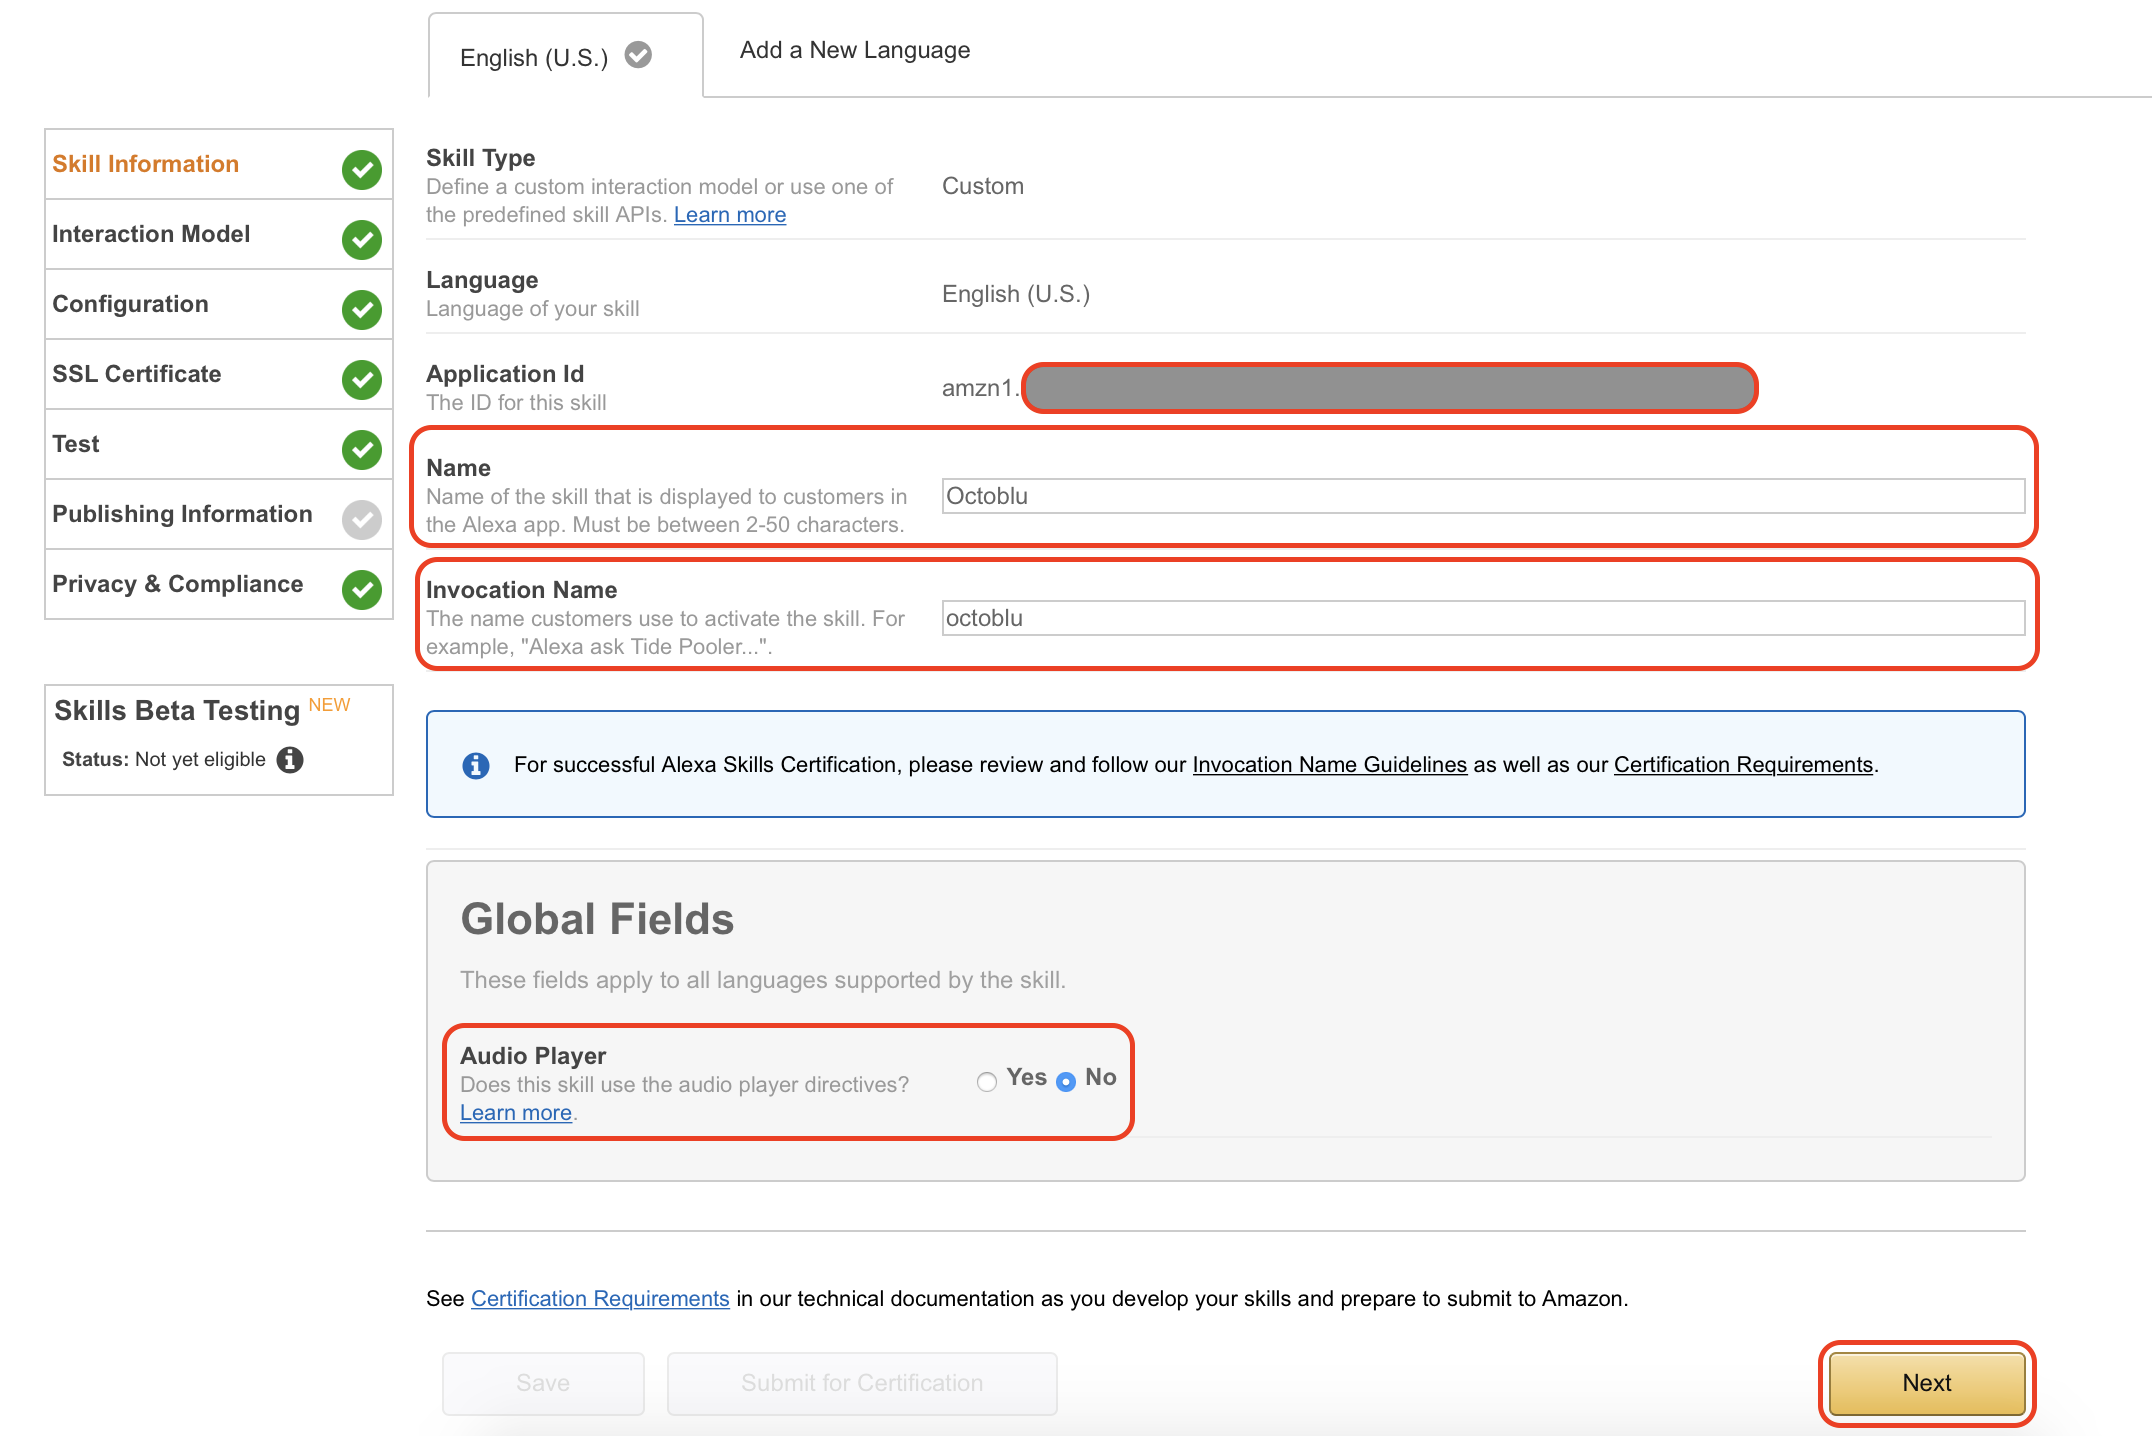
 11. Under “Global Fields” mark “HTTPS” as “Service Endpoint Type” and mark the geographical location near you. I have selected “North America” this time, but will try and change that since I am based in Denmark. Also make sure that you have “Account linking” enabled by marking “Yes” in that section.
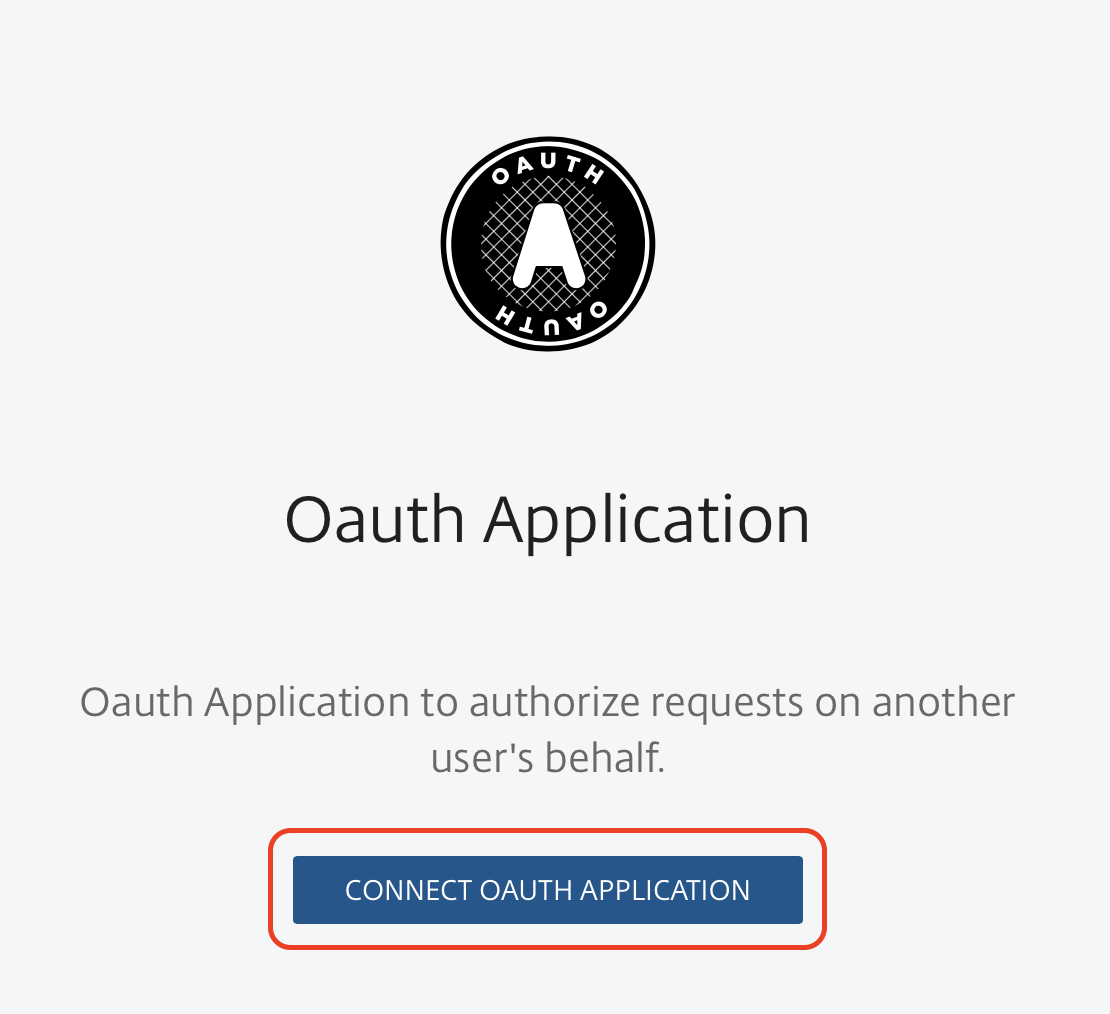
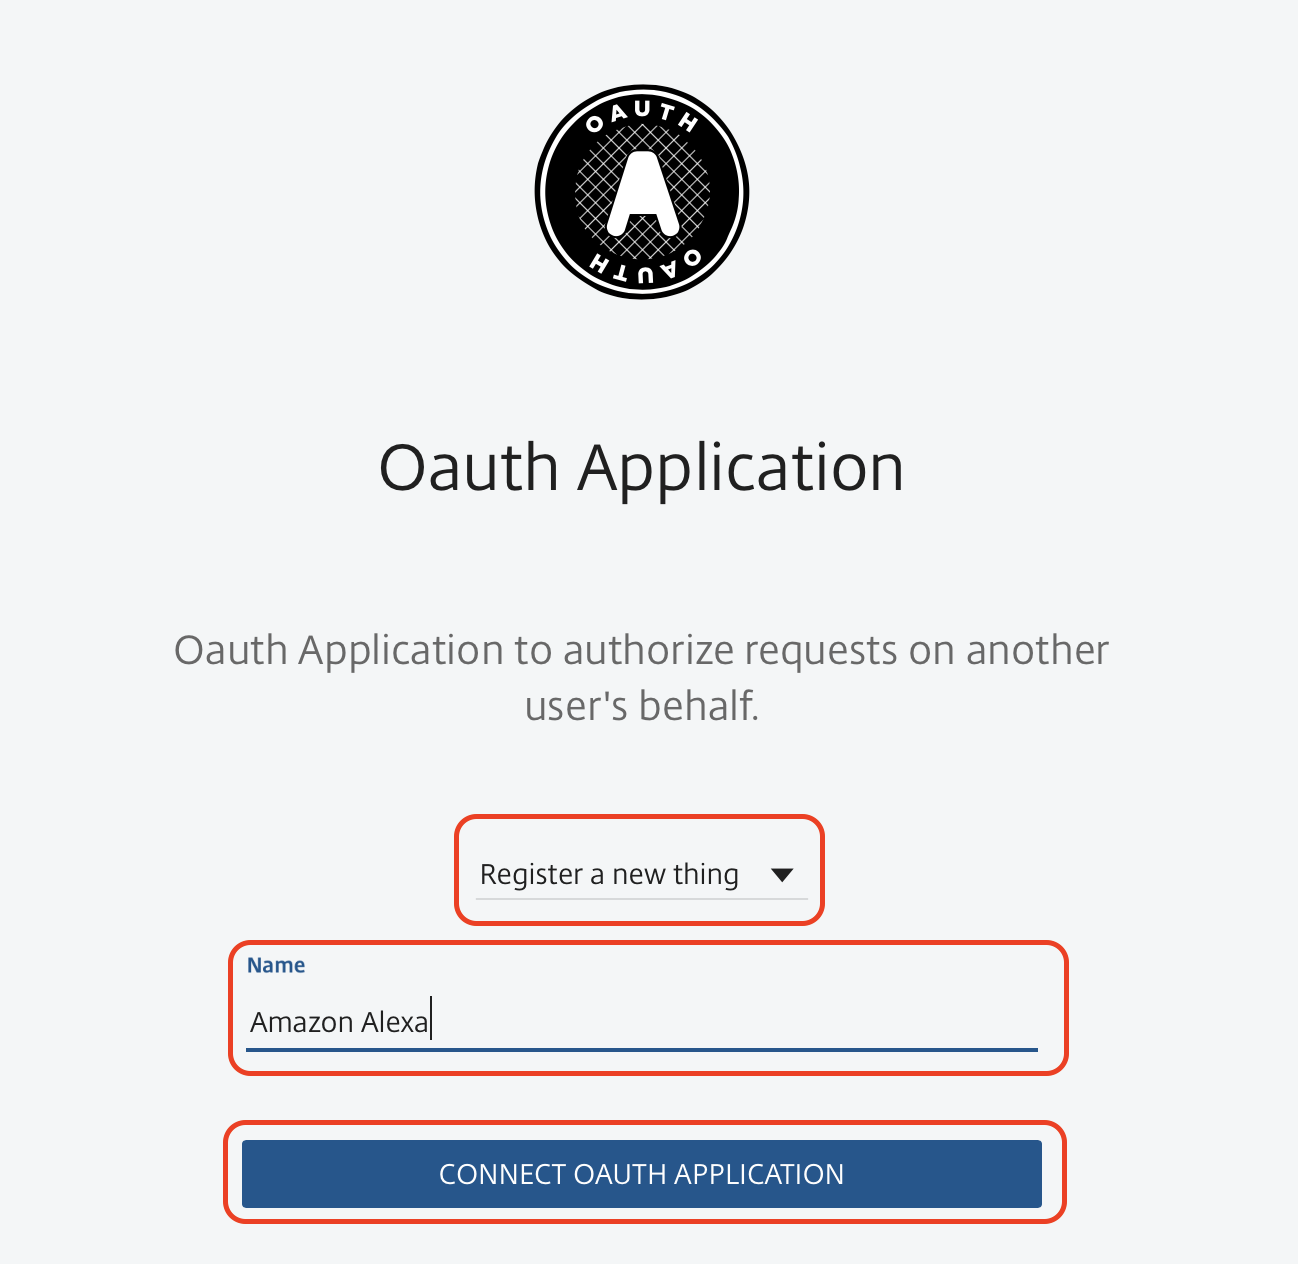
 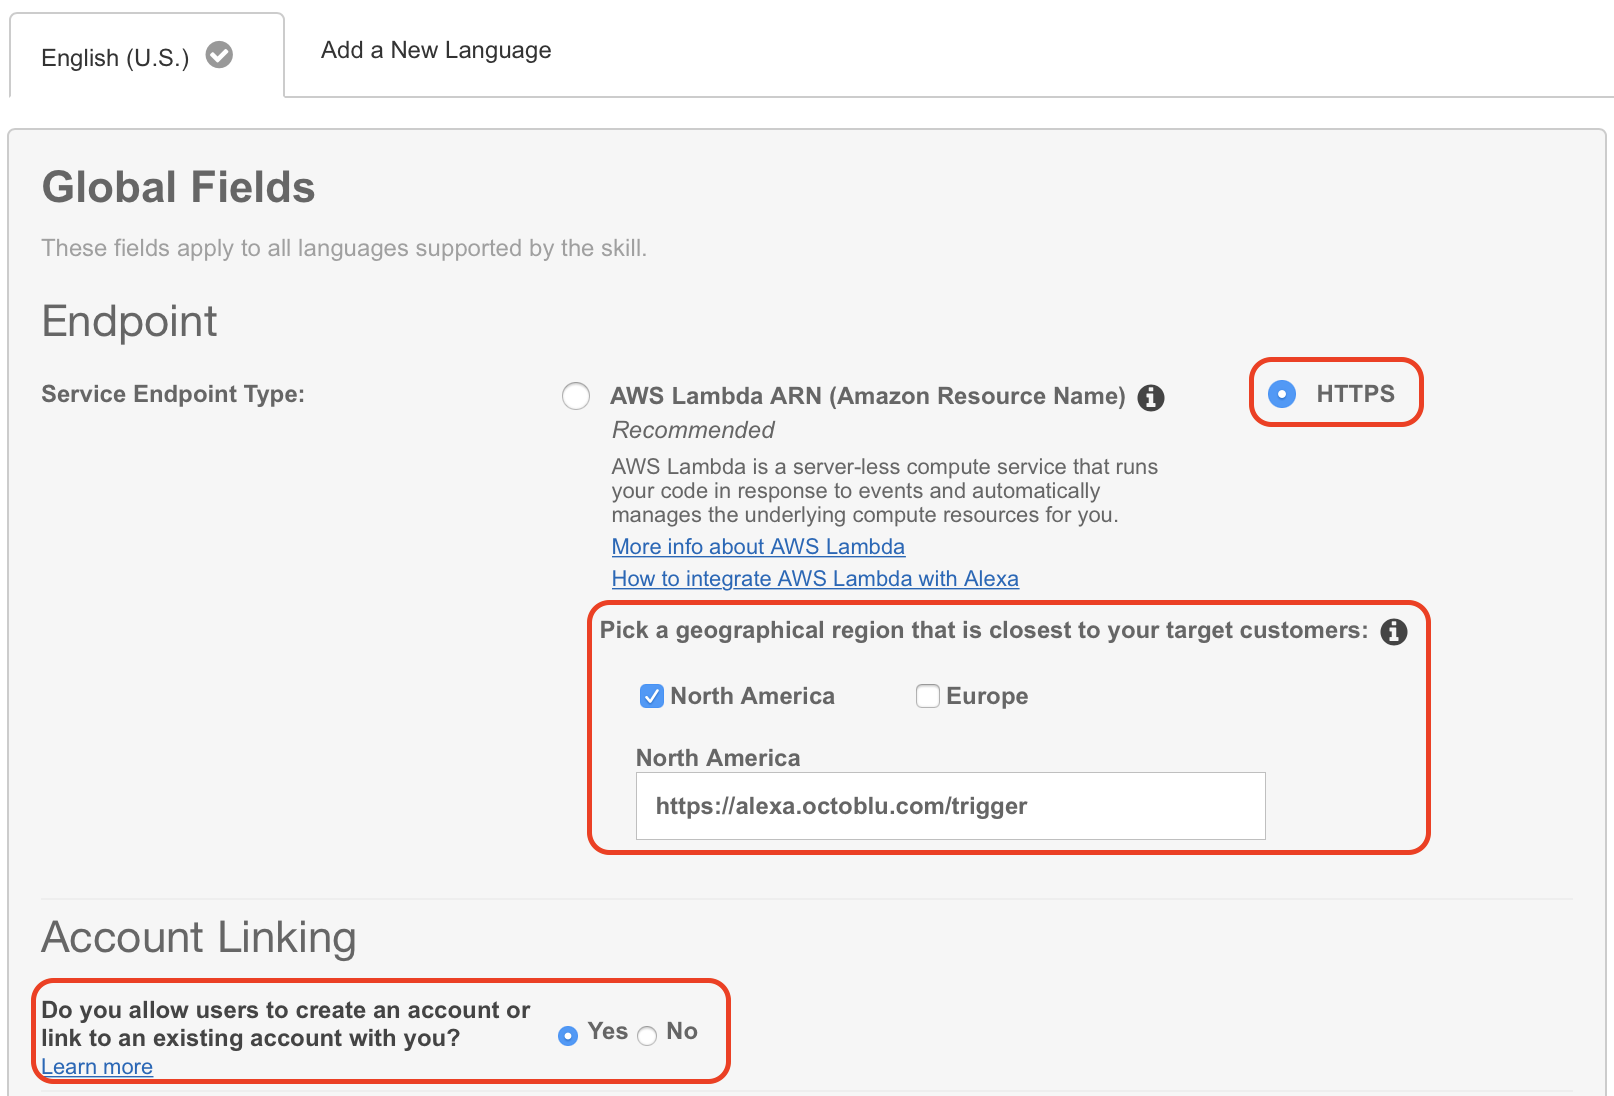 12. You will need to fill in some fields on this next screen. “Authorization URL” is “https://oauth.octoblu.com/alexa/authorize”. The client ID is the UUID from the app that we created in the Octoblu part of this guide. The domain list is a list of domains where you can fetch information from. I have used the list from the guide I found on GitHub. There is no need to set a scope for this setup.
 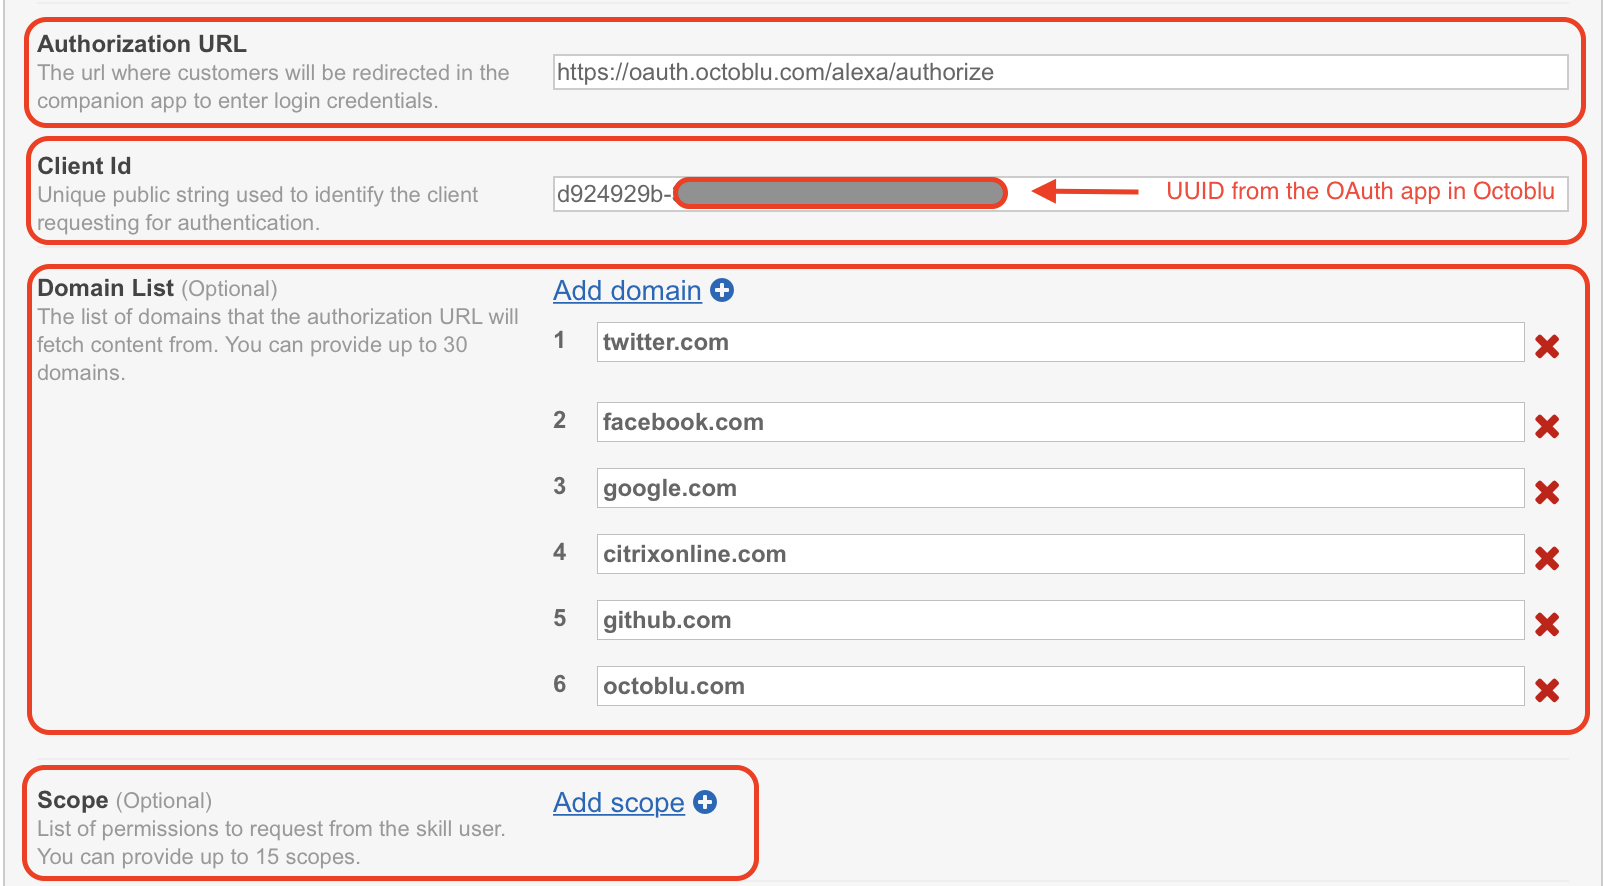 13. The redirect URLs are the ones you need to put back into the Octoblu app, so note them down. Set “Authorization grant type” to “Auth Code Grant”, set “Access Token URI” to “https://oauth.octoblu.com/access_token” and the “Client Secret” is the token that we generated in the Octoblu app. Set the “Client Authentication Scheme” to “HTTP Basic (Recommended)” and under permission I have put in “List Read” and “List Write” I don’t think they are needed, but this is how my working setup is created. The “Privacy Policy URL” I have set to “https://app.octoblu.com/terms”. Click on “Next” when ready.
 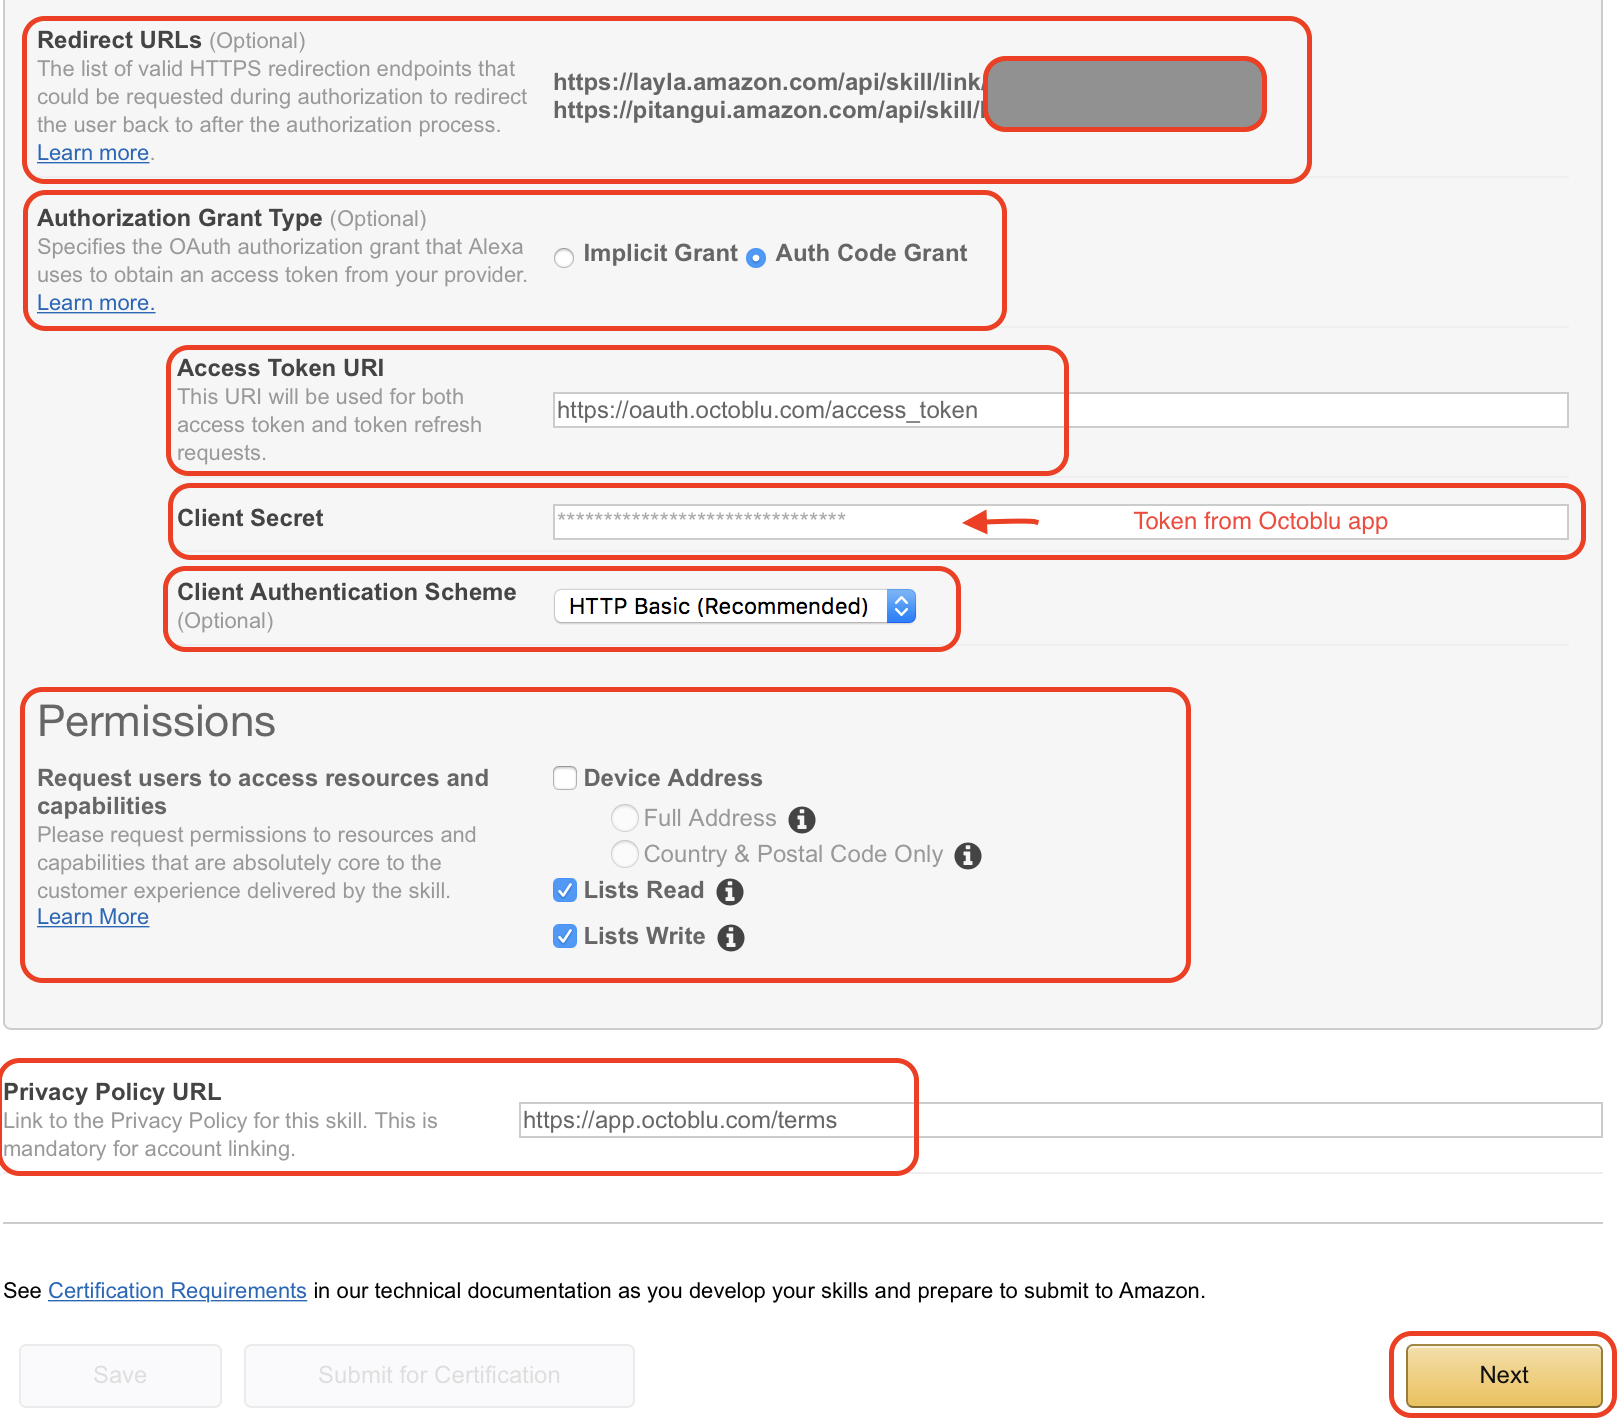 14. For the SSL certificate setup mark the “My development endpoint has a certificate from a trusted certificate authority” and click “Next”
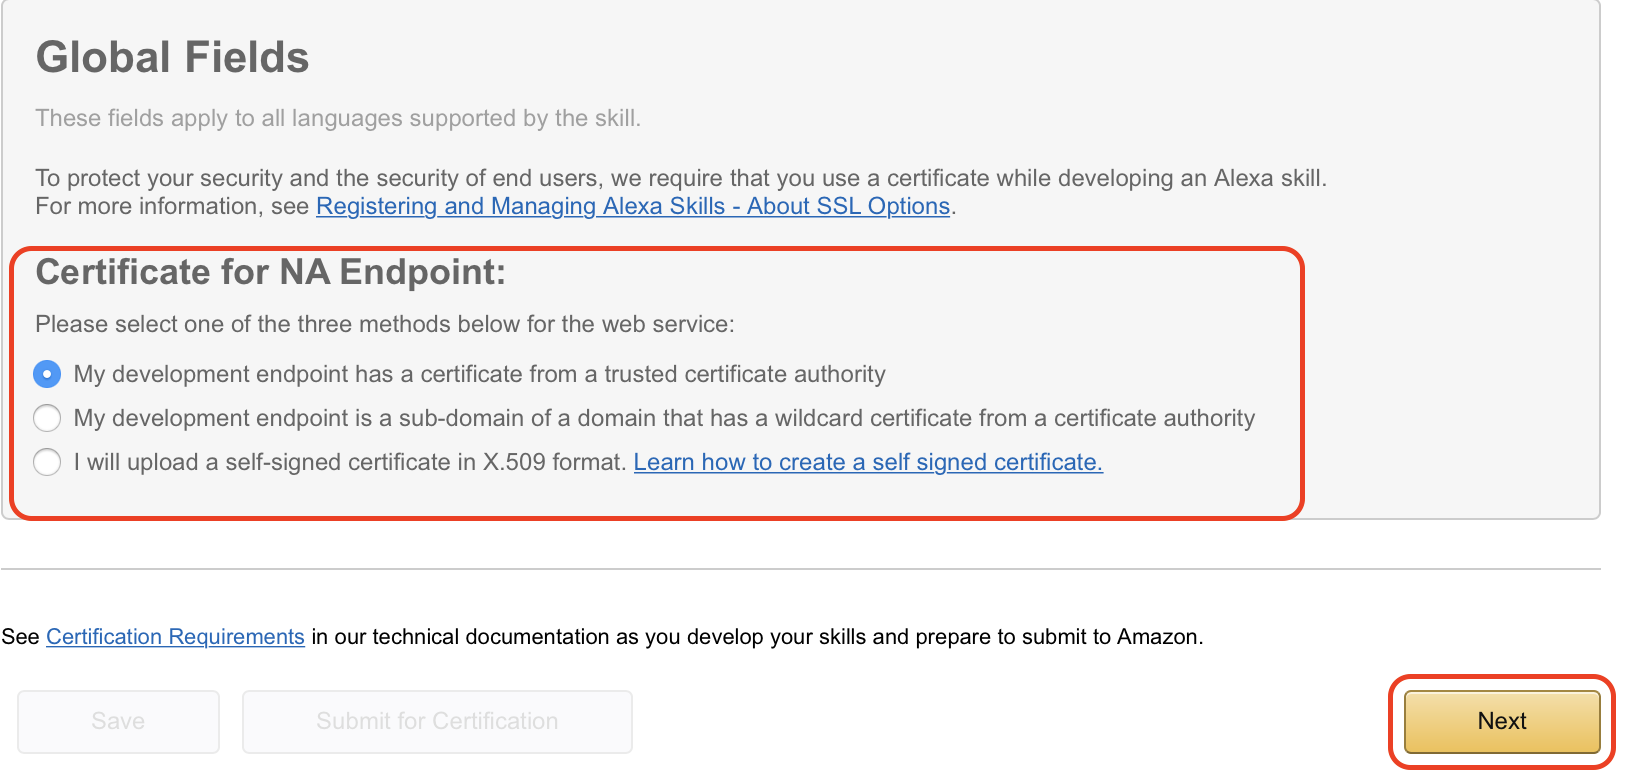 15. The next page isn’t used in my case, but just so you can follow along this is what it looks like. Click on “Next” to continue.
 16. The publishing section isn’t used in my case either. I did put a bit of information in there and I have posted screenshots below so you can follow along. Click on “Next” to continue.
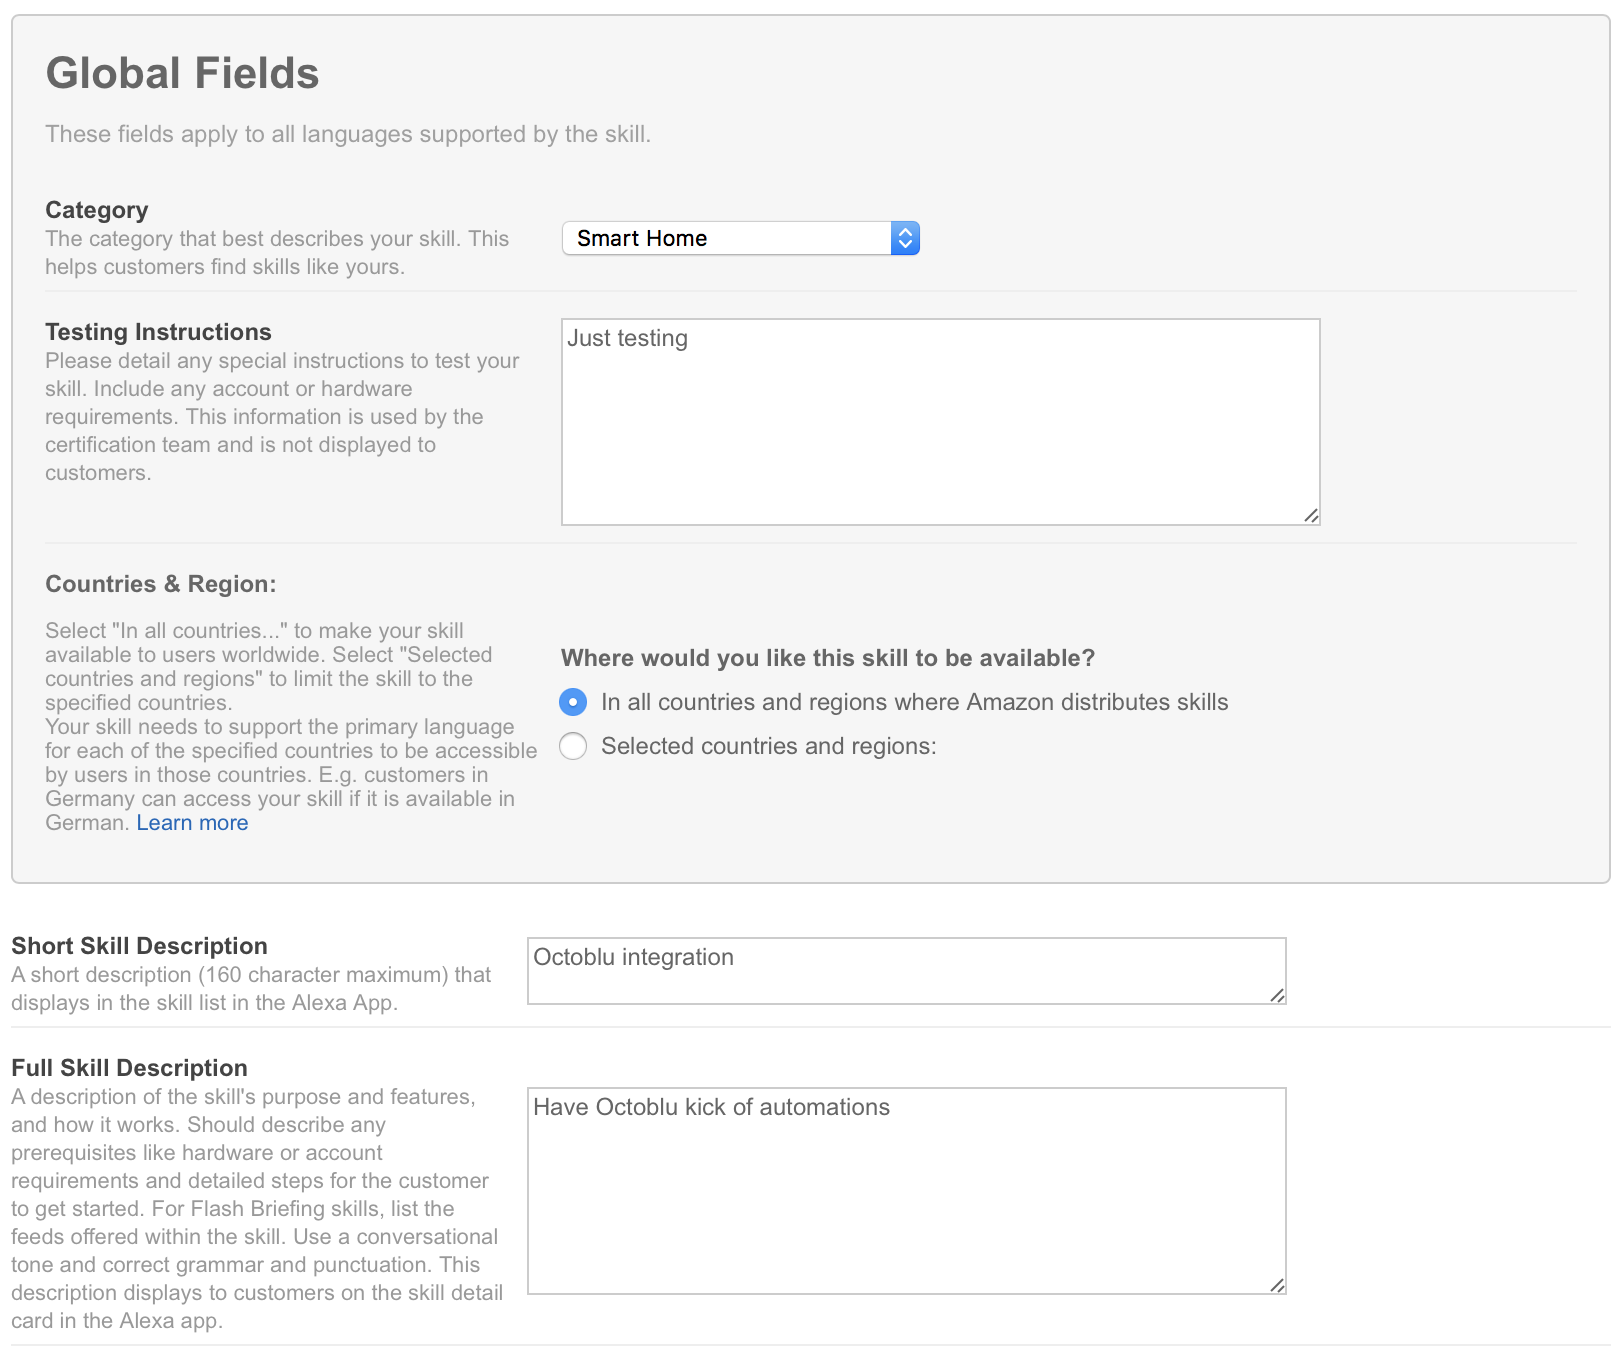
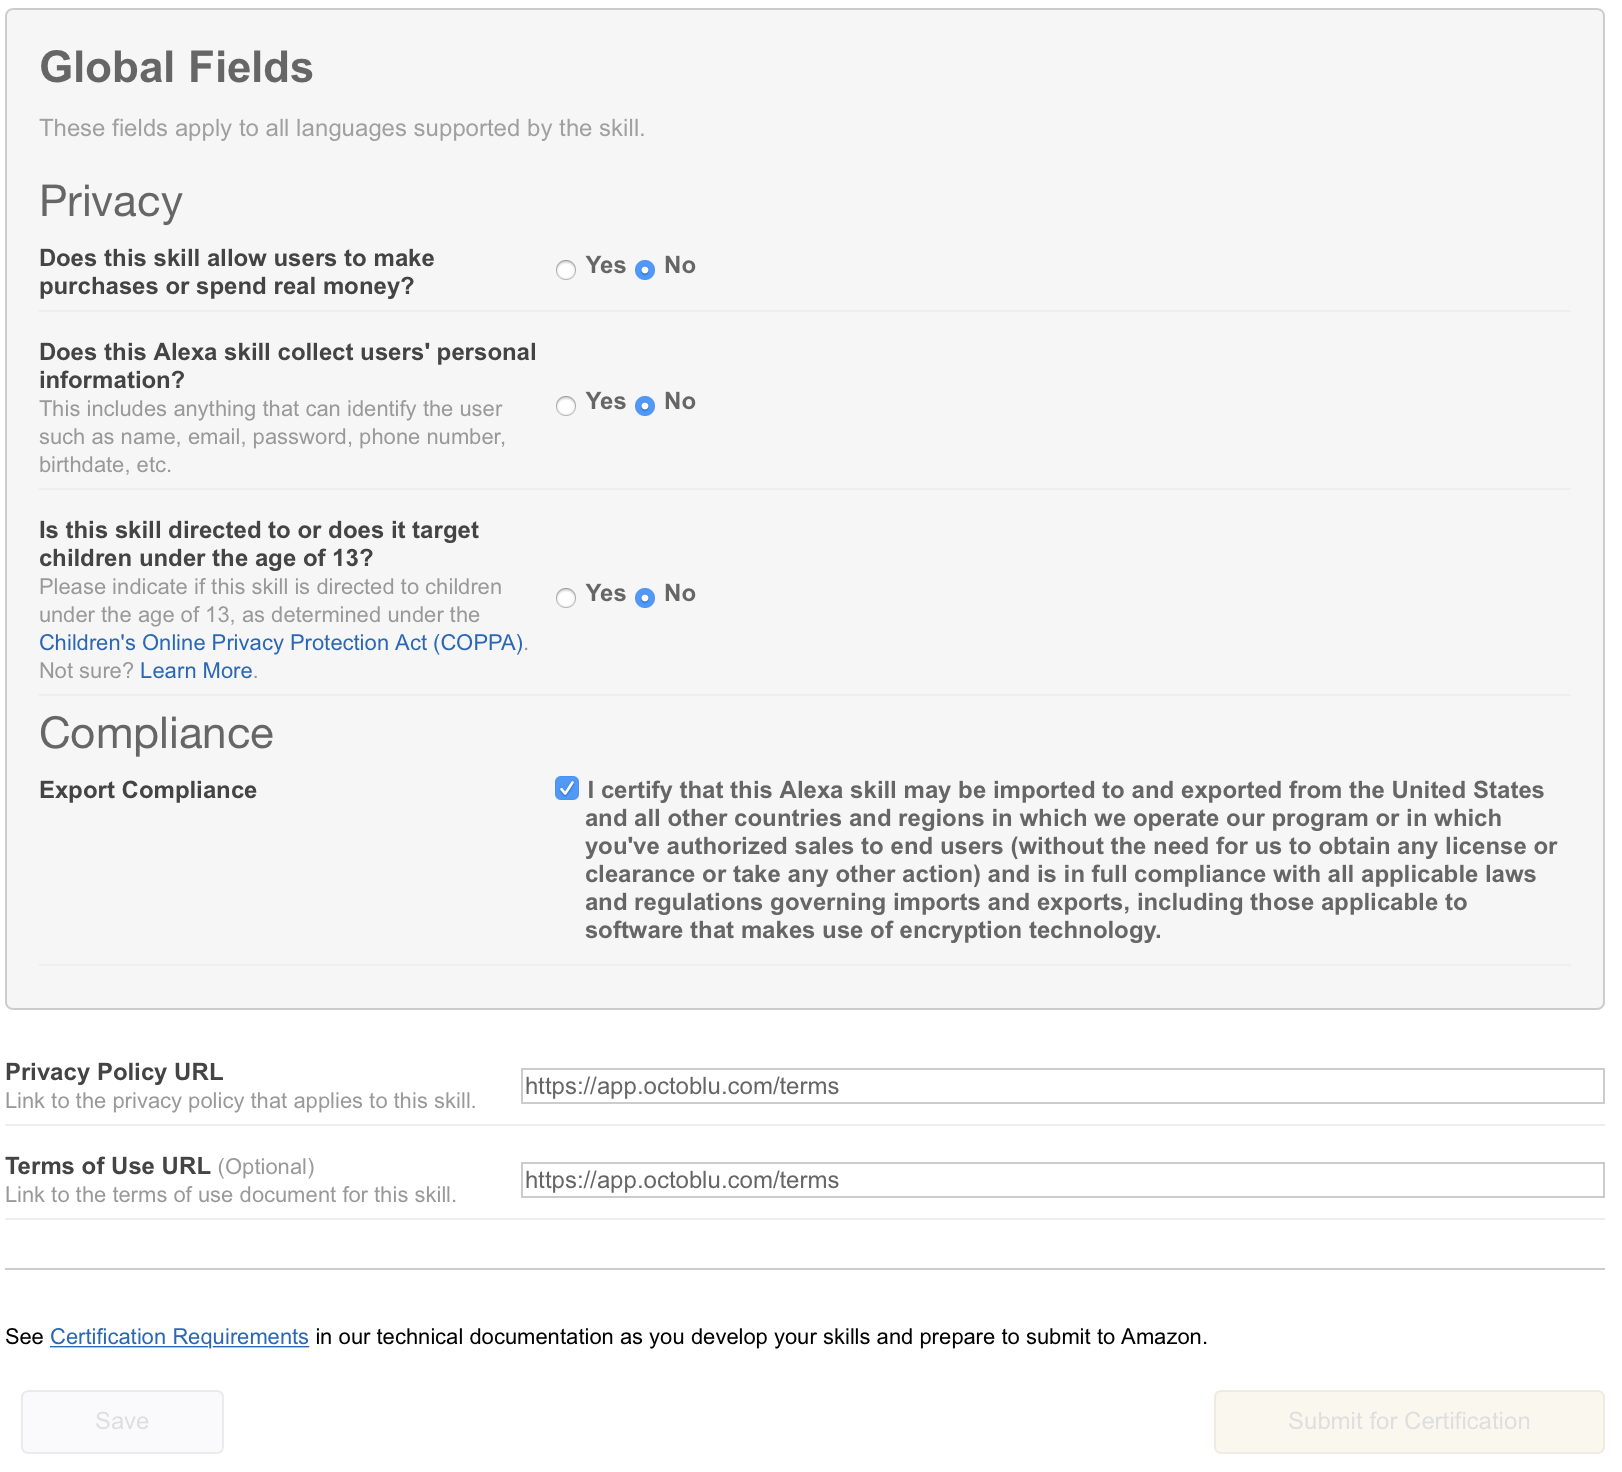
 17. On the last tab, we have privacy settings. I have filled them out, but since I am not publishing this skill it really isn’t needed. Click on “Save” to complete the setup.